Pages

OBDSTAR ODOMASTER & X300 PRO4

Wednesday, June 22, 2022

OBDSTAR P50 Reset Ford EcoSport Airbag

 This post comes with the guide about how to reset airbag by OBDSTAR P50 on bench.

https://youtu.be/rZneCQtqaK8

Preparation:

OBDSTAR P50 Airbag Reset Tool

(incl. P50 main unit+ P004 jumper+ P004 adapter+ main cable)

Airbag ECU: e.g.FORD EcoSport ECU
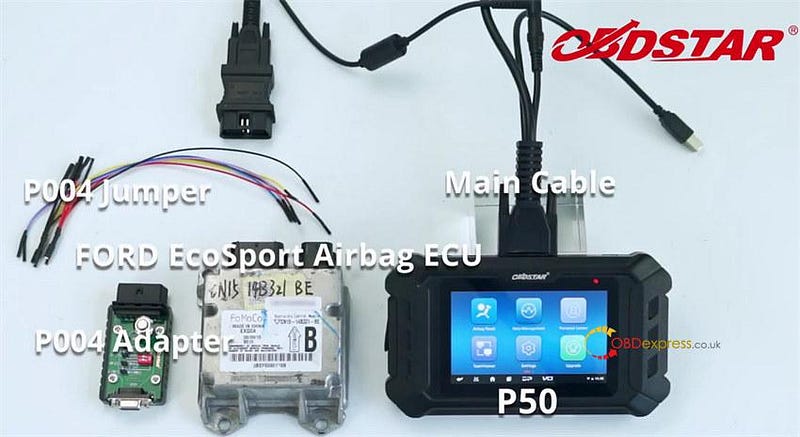
Reset Airbag by OBDSTAR P50 on Bench

Keep OBDSTAR P50 in charging and communication in the whole process. Also ensure the internet connection is normal.

Main operation guide:

1.Connection

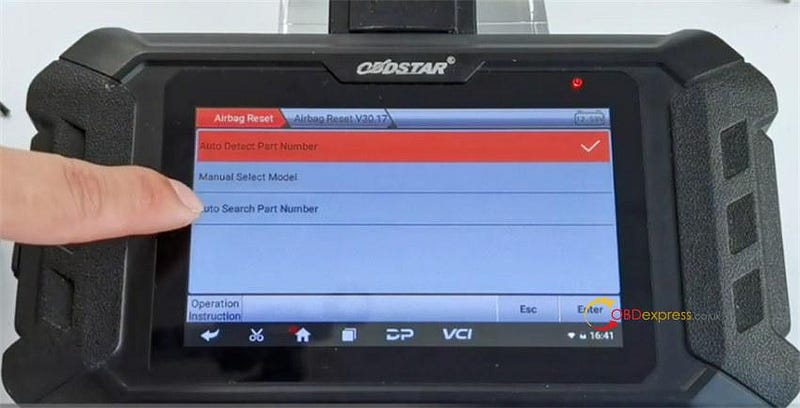
Select Airbag Reset>> Airbag Reset V30.17 (choose the newest version)>> Auto Search Part Number
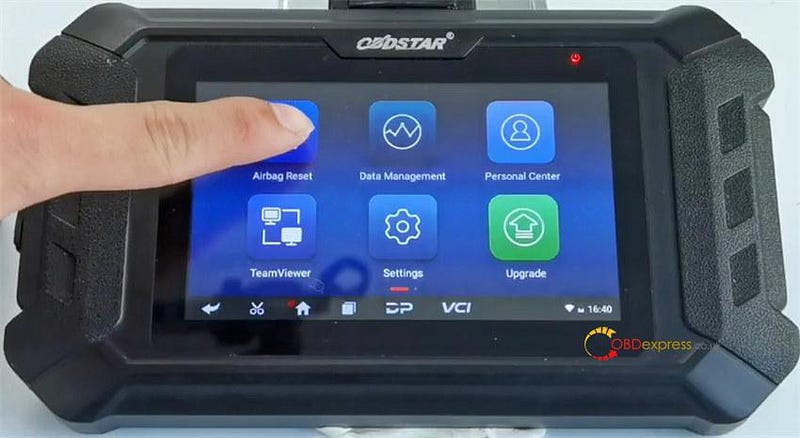
Reset Airbag by OBDSTAR P50 on Bench

Reset Airbag by OBDSTAR P50 on Bench

Note: click 'Operation instruction' at the bottom left to check the best detect way.

Input the part number of ECU manually
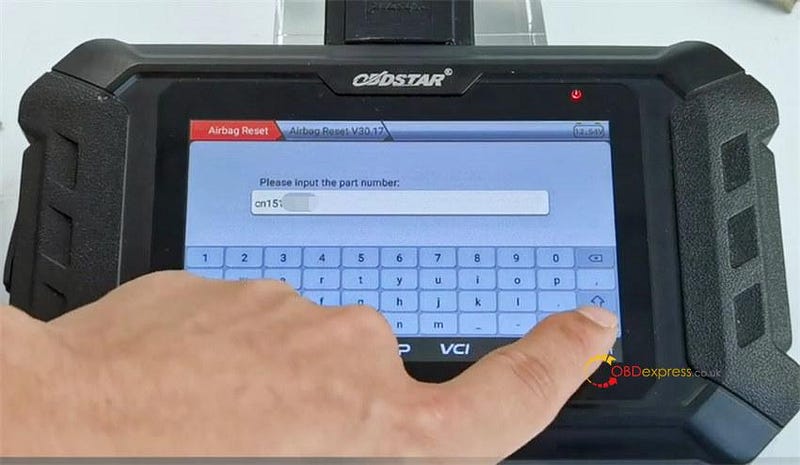
Reset Airbag by OBDSTAR P50 on Bench

Note: The part number can be found on ECU's label. The number input is case- insensitive. Fuzzy retrieval is supported.

Confirm the value entered is correct.

Select the related airbag ECU model in the list

Refer to the 'Diagram' at the bottom left corner to connect cables correctly

Different cars are with different airbag ECU, choose the corresponding wiring diagrams.

Connect P004 adapter and P50 with the main cable

Then connect P004 adapter and airbag ECU with the P004 jumper

Set the 120Ωresistance switch of P004 adapter to on
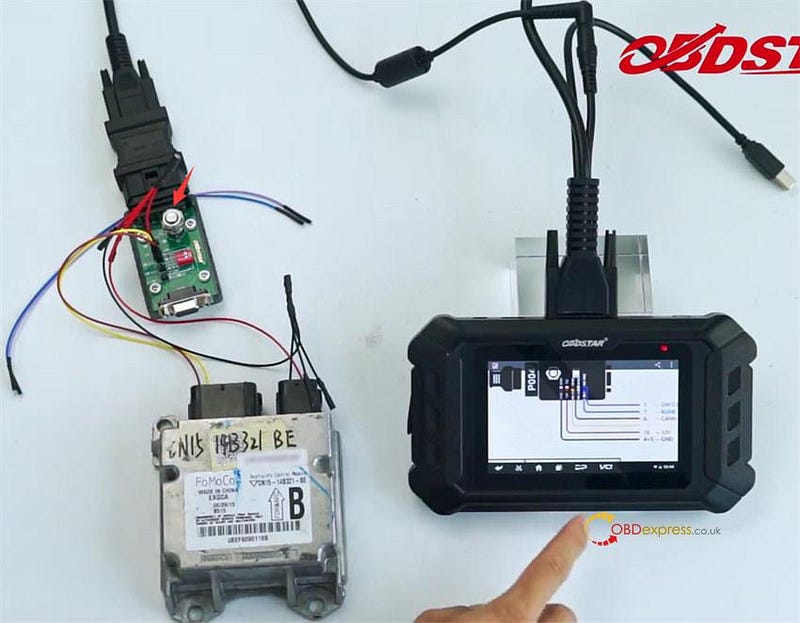
Reset Airbag by OBDSTAR P50 on Bench

2.Airbag reset

Main steps: Read DTC>> Backup EEPROM data>> Erase Crash>> Erase DTC>> Read DTC again
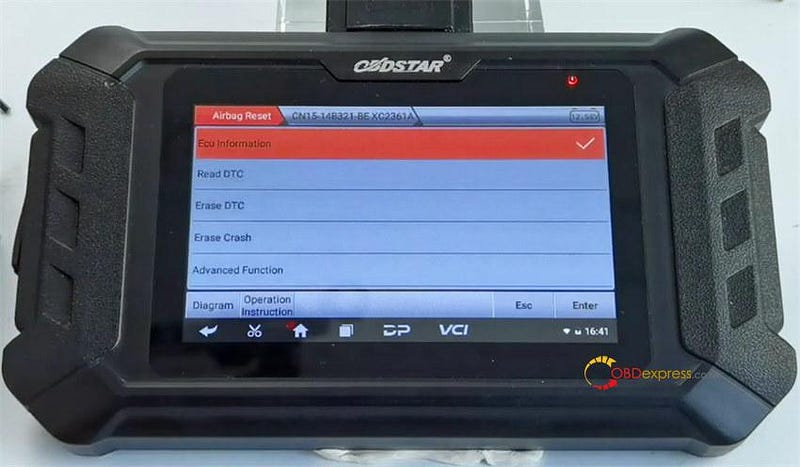
Reset Airbag by OBDSTAR P50 on Bench

Step 1: Read DTC

There is a crash fault code (CRASH Event Storage Full and Locked!!!)
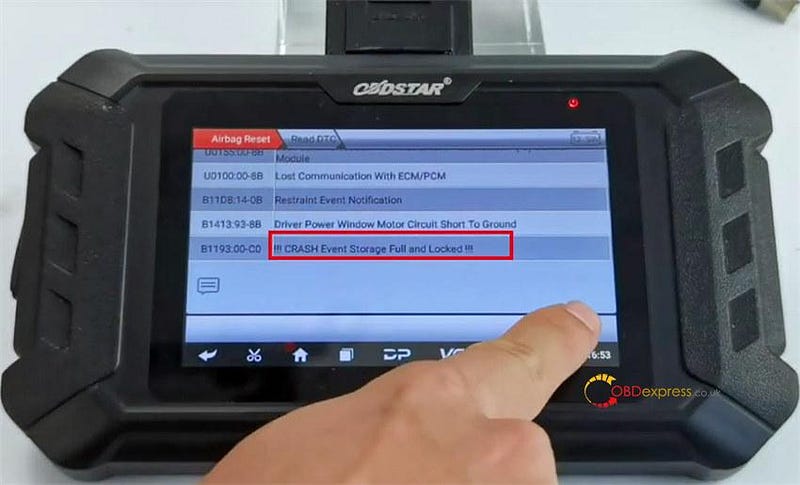
Reset Airbag by OBDSTAR P50 on Bench

Step 2: Read and backup EEPROM data

Before airbag reset, read EEPROM in advance function and then save it in case of data lost caused by wrong operation.
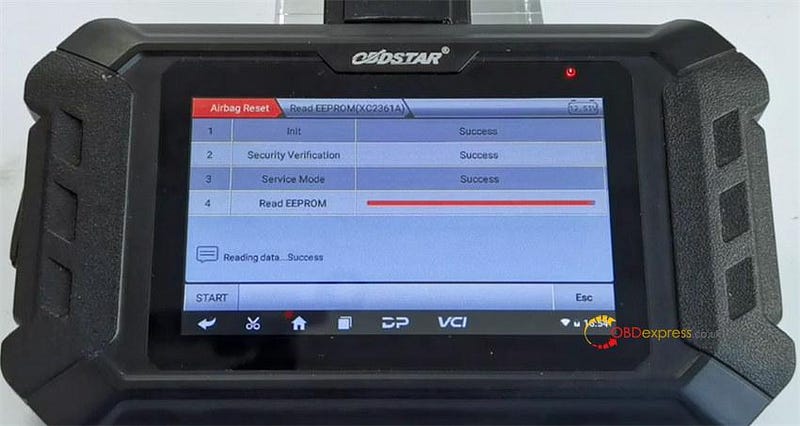
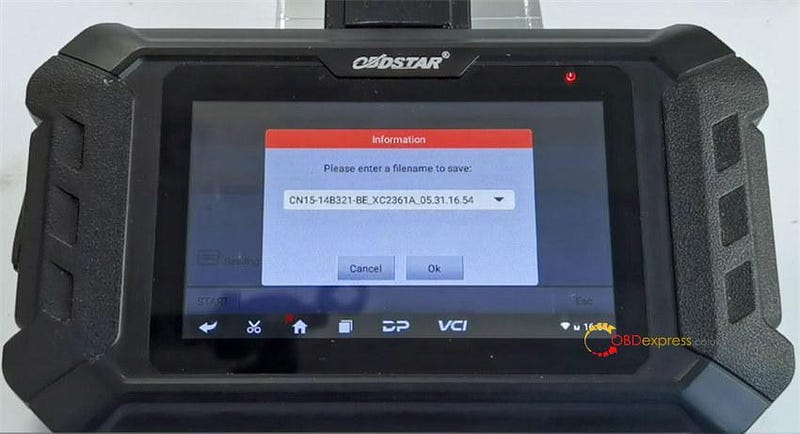
Reset Airbag by OBDSTAR P50 on Bench

Reset Airbag by OBDSTAR P50 on Bench

Turn off power button of OBDSTAR P004 adapter for 30 seconds and turn on again Step 3: Erase Crash

Choose the EEPROM data saved in the last step to erase crash data

Confirm the Read EEPROM function has been executed

Erase crash in file success
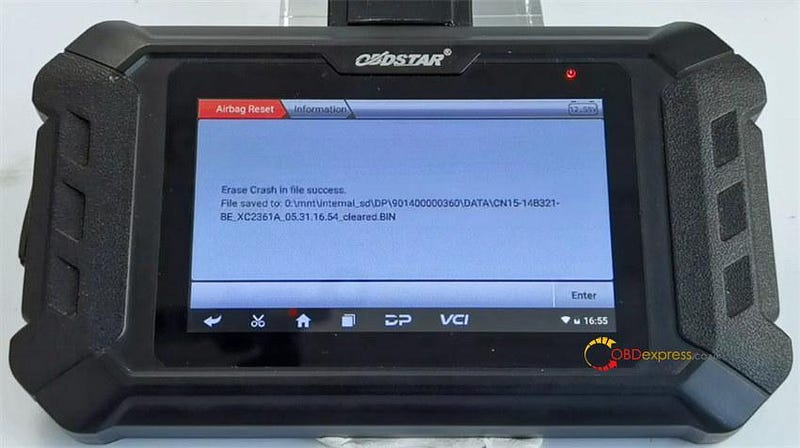
Reset Airbag by OBDSTAR P50 on Bench

Press 'Start' at the left bottom to start Write EEPROM function
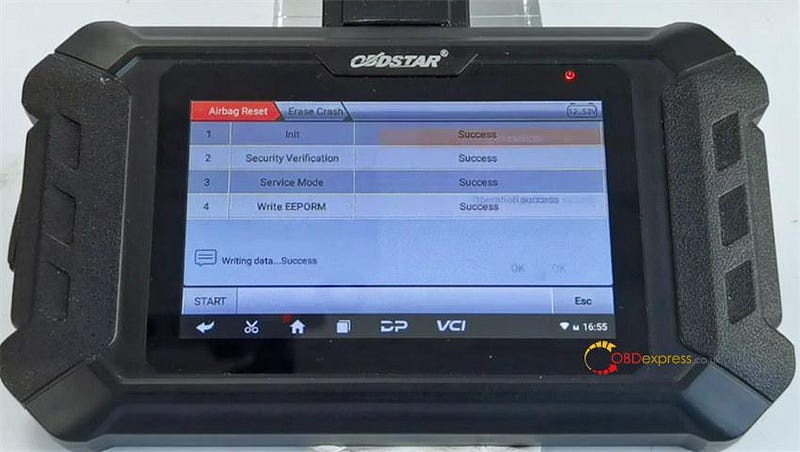
Reset Airbag by OBDSTAR P50 on Bench

Turn off power button of OBDSTAR P004 adapter for 30 seconds and turn on again

Step 4: Erase DTC

Click 'Erase DTC' to clear fault code

Crash fault code has been erased successfully

Step 5: Read DTC again

Read DTC again to check the fault code, there is no crash fault code on the screen.
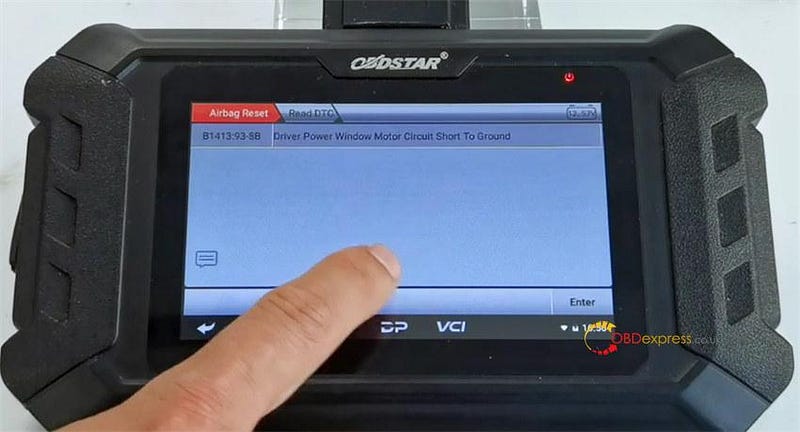
Reset Airbag by OBDSTAR P50 on Bench

That's the operation guide to reset airbag by OBDSTAR P50 on bench. Easy and fast!

Besides, OBDSTAR X300 DP Plus and ODOMaster also can reset airbag. Check more details in OBDSTAR X300 DP Plus/ ODOMaster/ P50 Reset Airbag Guide (Attach Support Car List)

www.obdexpress.co.uk

OBDSTAR X300 DP Plus Programming Nissan Kicks & Micra K14 pincode

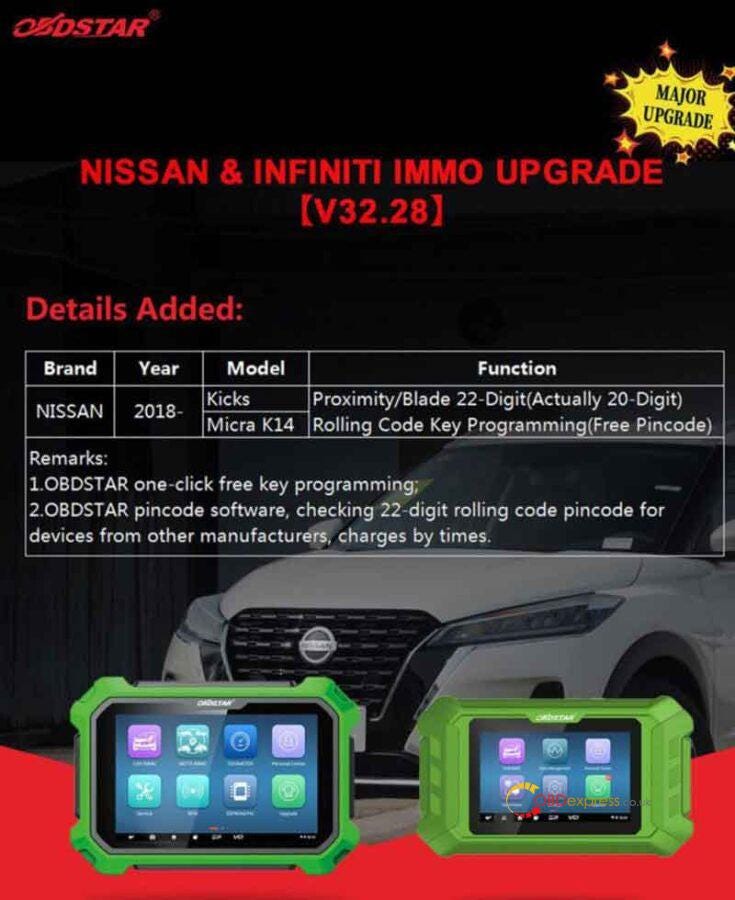
 OBDSTAR can support one-click free key programming or check 22-digit rolling pincode for 2018+ Nissan Kicks & Micra K14. Only to update your OBDSTAR X300 DP Plus/ X300 Pro4 Tablet to latest version V32.28.

OBDSTAR X300 DP Plus V32.28 programming Nissan rolling pincode

Program 2019 Nissan Kick with Free Pincode

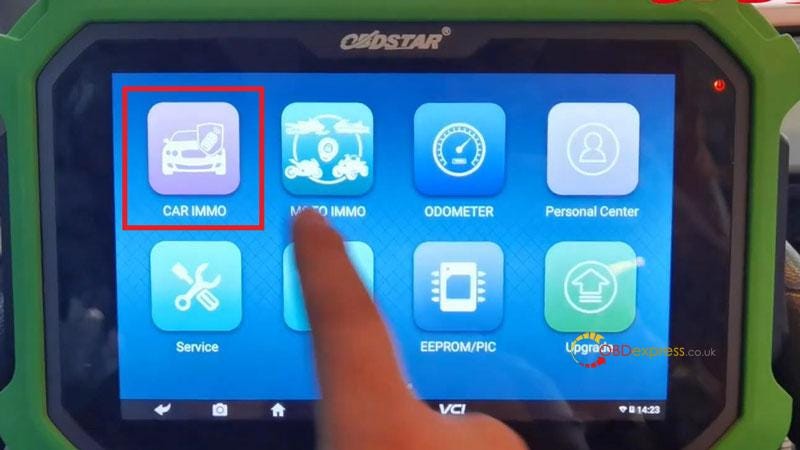
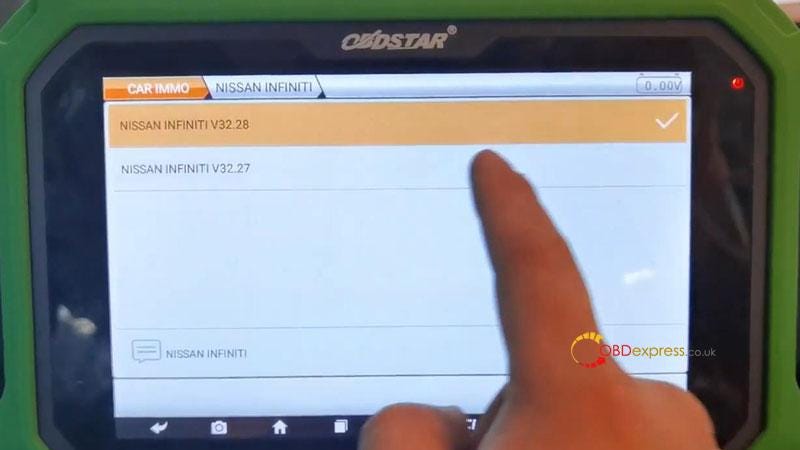
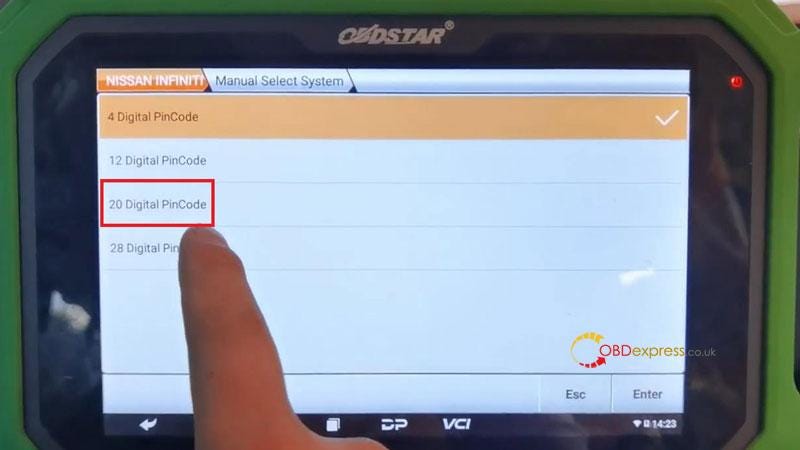
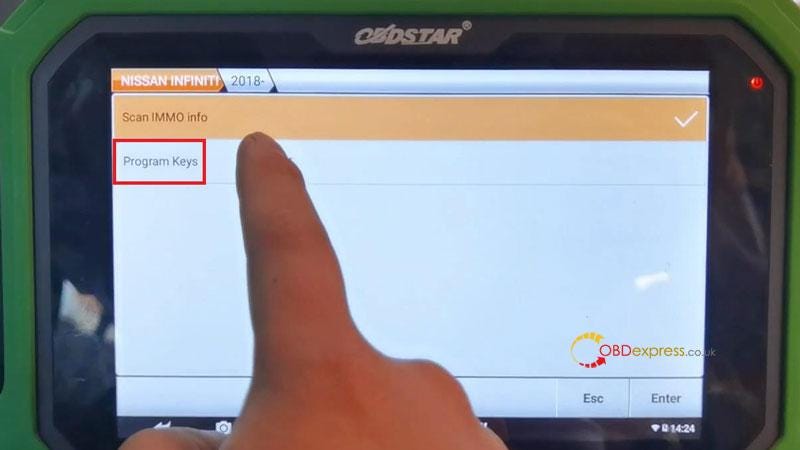
Car IMMO >> NISSAN INFINITI >> NISSAN INFINITI V32.28 >> Manual select system >> 20 digital pincode >> Proximity >> Manual select mode >> KICKS >> 2018- >> Program keys

OBDSTAR X300 DP Plus V32.28 programming Nissan rolling pincode

OBDSTAR X300 DP Plus V32.28 programming Nissan rolling pincode

OBDSTAR X300 DP Plus V32.28 programming Nissan rolling pincode

OBDSTAR X300 DP Plus V32.28 programming Nissan rolling pincode

This function is available by connecting the server, please ensure the Internet connection is normal.

All keys will be erased.

Turn off the ignition, open the emergency switch.

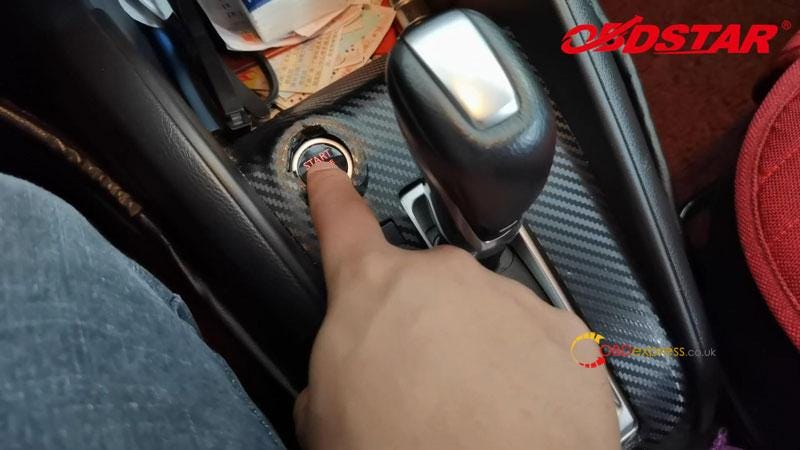
Press start button, the indicator flashes on the start button. 5 seconds with 1th smart card logo on the center of smart button. Instrument automatically light up.

Switch ignition off, please wait 5s.

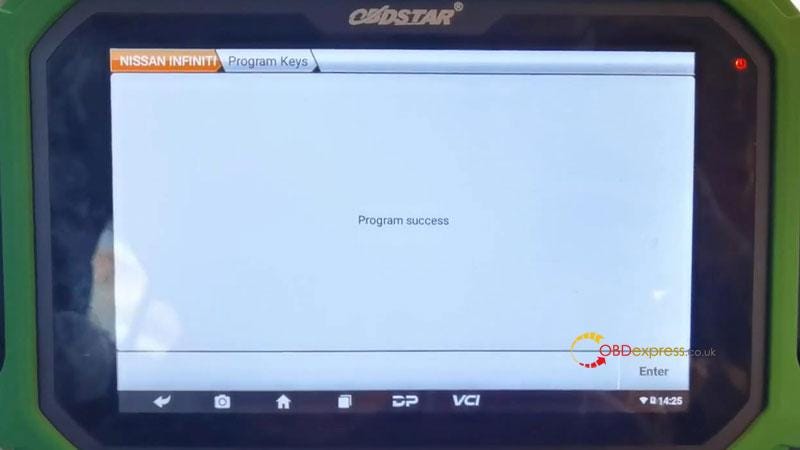
Program success.

Press “Enter” to program next one, otherwise, press “Esc”.

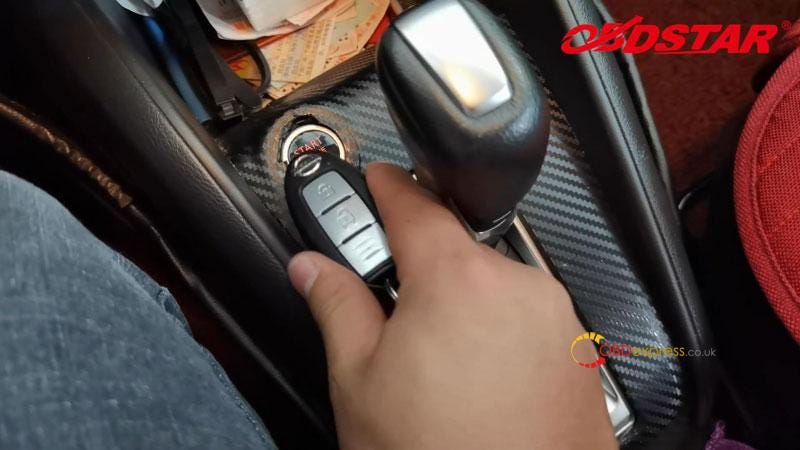
Within 5s, tap the start button with the marker side of the first proximity key, then release it and attach it to the start button until the ignition is on and the buzzer beeps.

Switch ignition off, please wait 5s.

Program success.

OBDSTAR X300 DP Plus V32.28 programming Nissan rolling pincode

OBDSTAR X300 DP Plus V32.28 programming Nissan rolling pincode

OBDSTAR X300 DP Plus V32.28 programming Nissan rolling pincode

Read 2018 Nissan Kicks Rolling Code

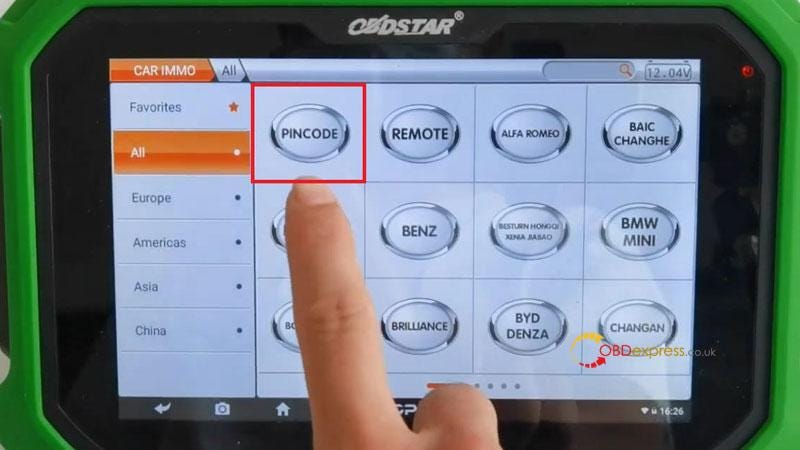
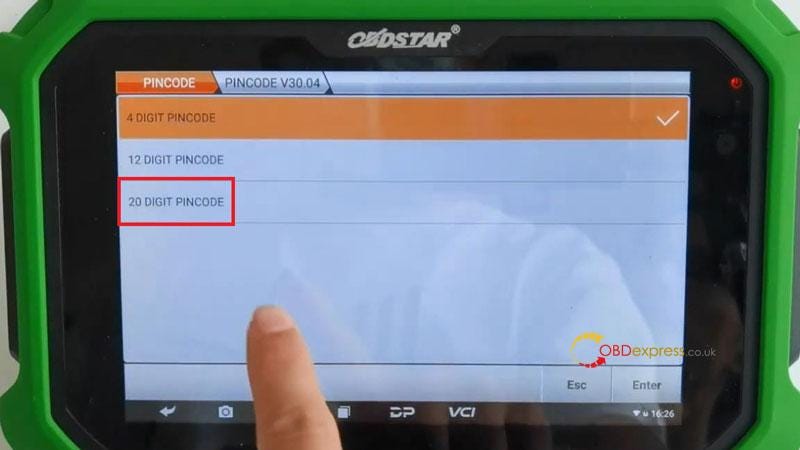
Car IMMO >> Pincode >> PINCODE latest version >> NISSCAN/INFINITI >> 20 Digit Pincode >> KICKS >> 2018- Blade/Proximity

This function is available by connecting the server, please ensure the Internet connection is normal.

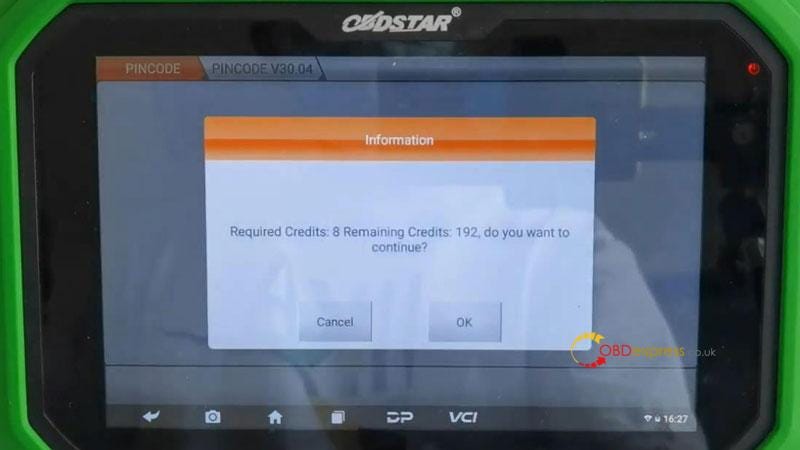
  • This function is developed in cooperation with a third party. A certain fee is required to inquire the password(8 credits);
  • It is possible to query fails. No fee will be deducted if the query fails, please rest assured to use.
    1. Required Credits:8

      Press “OK” to continue.

      OBDSTAR X300 DP Plus V32.28 programming Nissan rolling pincode

      OBDSTAR X300 DP Plus V32.28 programming Nissan rolling pincode

      OBDSTAR X300 DP Plus V32.28 programming Nissan rolling pincode

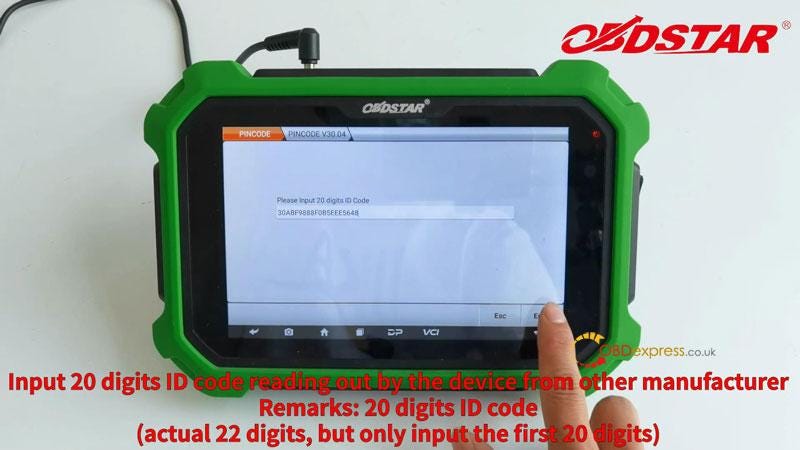
      Input 20 digit ID code reading out from other manufacturers.

      (Actual 22 digits, but only input the first 20 digits)

      Credits deducted: 8

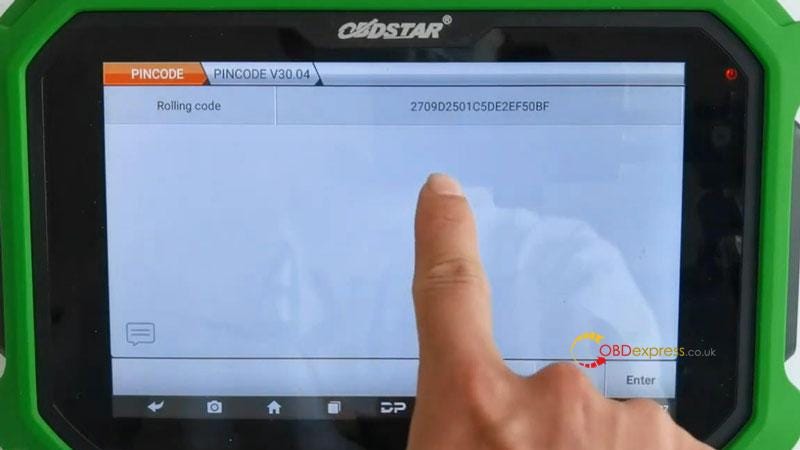
      Rolling code has been calculated out successfully.

      OBDSTAR X300 DP Plus V32.28 programming Nissan rolling pincode

      OBDSTAR X300 DP Plus V32.28 programming Nissan rolling pincode 

      This is how to use Key Master DP Plus/ Key Master 5 to program & check pincode for 2018+ Nissan Kicks.

      www.obdexpress.co.uk

      Monday, June 13, 2022

      How to reset airbag using OBDSTAR product?

       With the newly released OBDSTAR P004 Airbag Reset Kit, OBDSTAR X300 DP Plus C Package full version/ODO Master/P50 can reset airbag for 38 brands of vehicles and over 3000 ECU Part No. It’s friendly, economical, and convenient for vehicle repair plants and fast repair shops.

      What is OBDSTAR AIRBAG RESET KIT?

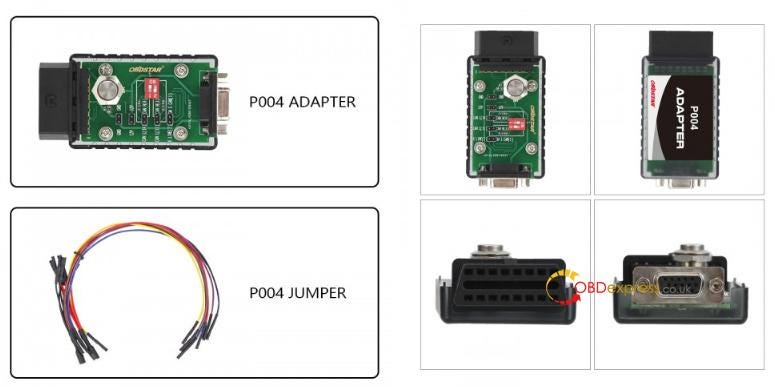
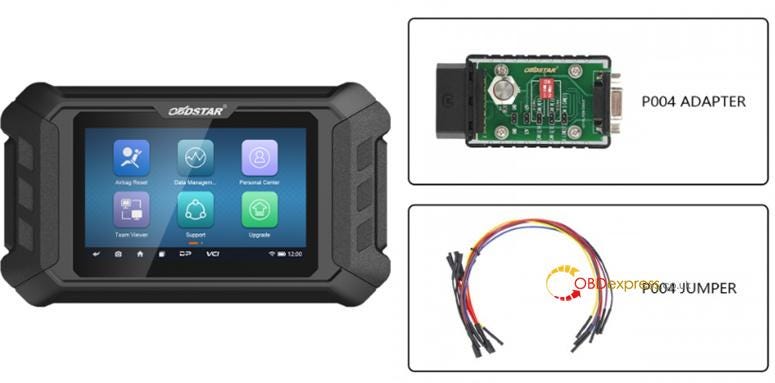
      The AIRBAG RESET KIT comes with a P004 Adapter and a P004 Jumper.

      OBDSTAR series product airbag reset tutorial

      P004 adapter is designed for ECU programming, reading, or writing data in bench mode.

      • Read ECU Info.
      • Read DTC
      • Erase DTC
      • Read EEPROM
      • Write EEPROM
      • Read FLASH
      • Write FLASH
      • Erase Crash
      • Write VIN

      It has merits below:

    2. Programming devices keep in normal communication no matter turn on or off the 12V power button;
    3. Turn on or off 120Ω resistance at any time for CANBUS ECU;
    4. Support 6&14 and 3&11 CANBUS communication at the same time;
    5. Support GM Single CAN (GM SCAN);
    6. Support K communication;
    7. P004 jumper can connect with multiple wires at the same time, making wiring clearer and easier;
    8. DB15 connector can communicate with any OBDII-16 I/O interface.
      1. What is OBDSTAR P50?

        It is a new generation of intelligent airbag reset tool based on RK3128 quad-core processor and equipped with 5-inch capacitive touch-sensitive screen. Very fast and smooth!

        It comes with OBDSTAR P50 main unit, P004 adapter& jumper, main cable, and 12V2A charger, also contains airbag reset software.

        OBDSTAR series product airbag reset tutorial

        Function:

      2. Supports one-click airbag reset for 38 brands and over 3000 ECU part No.
      3. Supports fuzzy search for ECU part No.
      4. Contains clear BENCH mode wiring diagram
      5. Contains powerful and complete description files for fault code
        1. So, how to reset airbag with these OBDSTAR tools?

        2. Reset airbag by OBDSTAR X300 DP Plus C
          1. What is required: X300 DP Plus/Key Master DP Plus C+ OBDSTAR P004 airbag reset kit

            Note: If you have an X300 DP Plus C full version that has already contained airbag reset software, no need to buy the authorization again, just need to buy an airbag reset kit.

          2. Reset airbag by OBDSTAR ODOMaster
            1. What is required: ODO Master+ OBDSTAR airbag reset software+ OBDSTAR P004 airbag reset kit

              Note: If you have a odomaster, you have to pay extra for the airbag reset software, and you will get a free P004 airbag reset kit.

            2. Reset airbag by OBDSTAR P50
              1. What is required: OBDSTAR P50 airbag reset tool full package

                Note: Buy Mileage Correction Authorization, get the same Odometer Adjustment function as the odomaster.

                Which vehicle can reset airbag with OBDSTAR?

                Check OBDSTAR Airbag Reset Support List

                Vehicle coverage:

              2. Supported Brands (38 Brands)
                1. Acura

                  Audi

                  Benz

                  Buick

                  Cadillac

                  Chevrolet

                  Chrysler

                  Citroen

                  Dacia

                  Dodge

                  Ford

                  GMC

                  GreatWall

                  Honda

                  Hyundai

                  Infiniti

                  Jaguar

                  Jeep

                  KIA

                  Land Rover

                  Lincoln

                  Maserati

                  Mazda

                  Mitsubishi

                  Nissan

                  Opel

                  Peugeot

                  Porsche

                  Renault

                  Seat

                  Skoda

                  Smart

                  Subaru

                  Suzuki

                  Tesla

                  Toyota

                  VW

                  Volvo

                2. Over 3000 ECU part No.(supporting fuzzy search)
                3. MCU types
                  1. H8SX

                    RH850

                    SPC

                    XC2XXX

                    TC2XXX

                    TMS570

                    2022 OBDSTAR P50 Airbag Reset Tool.

                    OBDSTAR AIRBAG RESET KIT P004 Adapter + P004 Jumper.

                    If you need the OBDSTAR airbag reset software, feel free to contact our customer service.

                    www.obdexpress.co.uk

                    Thursday, May 26, 2022

                    Obdstar X300 DP Plus Read Continental PCR2.1 IMMO Data

                     How to use OBDSTAR X300 DP Plus + P003 Kit to read Continental PCR2.1 IMMO data on Bench? This is a tutorial on how to do, read the post below to learn more.

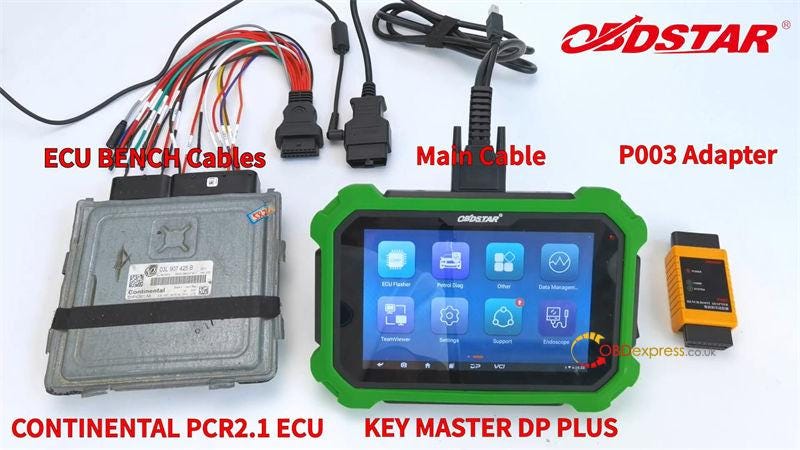
                    Tools Required

                    Continental PCR2.1 ECU

                    OBDSTAR X300 DP Plus(Key Master DP Plus)

                    P003 Bench Adapter

                    ECU Bench Cables

                    Main Cables

                    Note: Please keep X300 DP Plus in charging and communication in the whole process.

                    Obdstar X300 DP Plus Read Continental PCR2.1 IMMO Data

                    Procedure

                    Path: ECU Flasher >> Continental >> Continental Newest Version >> Manual Select System >> Continental PCR2.1(TC1796)(BENCH) >> Read IMMO data

                    Click “Bench mode wiring” in lower left to check wiring diagram.

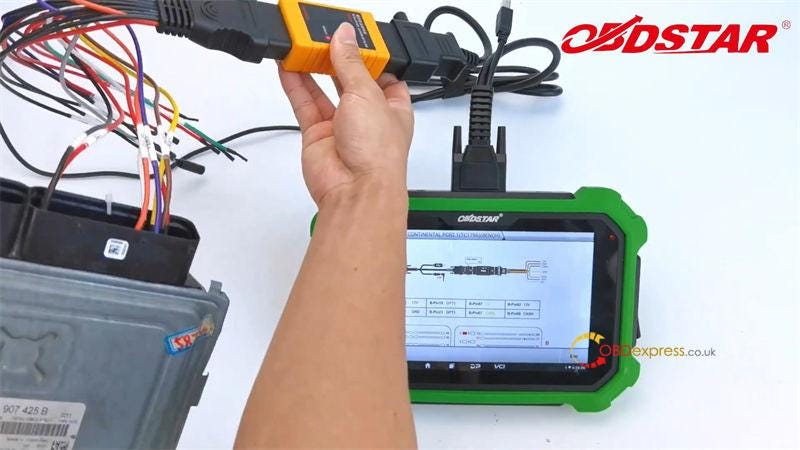
                    Connect P003 adapter with main cable & ECU Bench cables.

                    Connect ECU Bench cables with Continental PCR2.1 ECU according to wiring diagram.

                    Obdstar X300 DP Plus Read Continental PCR2.1 IMMO Data

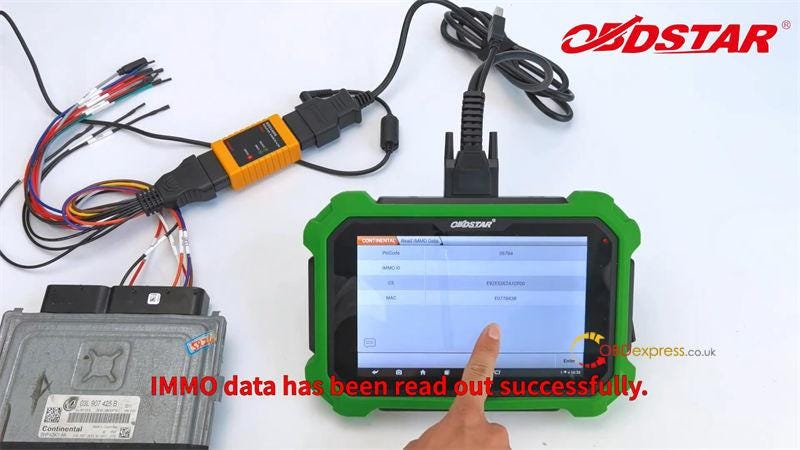
                    Click “Enter” to read IMMO data.

                    Rename & save data file.

                    IMMO data was read out successfully.

                    Obdstar X300 DP Plus Read Continental PCR2.1 IMMO Data

                    In addition, OBDSTAR Boot P003 also supports to work with X300 Pro4 for Audi, Citroen, DS, Mahindra, Peugeot, Skoda, SEAT, VW ECU reading. For more detailed models, please consult us.

                    www.obdexpress.co.uk

                    Monday, May 16, 2022

                    OBDSTAR mileage calibration steps for Peugeot & Citroen

                     When OBDSTAR series products (OBDSTAR ODO Master, OBDSTAR X300 DP Plus, OBDSTAR X300M) are used for Peugeot & Citroen odometer adjustment, it usually meets one of the following three situations:

                    Both device and BSI support OBD calibration;

                    Only BSI supports OBD calibration;

                    The BSI type is Delphi.

                    Below we describe the operation methods for these three situations in order.

                    Precautions for Peugeot & Citroen with OBDSTAR Mileage Tool

                    1. Both the instrument and BSI support the operation steps of OBD calibration:

                    1–1: First backup the data of instrument and BSI (remember the file name), so as to recover in case of exception;

                    1–2: First select and calibrate the mileage of the instrument. After the adjustment, do not turn off the engine. Cut off the power of the instrument as soon as possible (remove the fuse or remove the instrument) to avoid data recovery;
                    1–3: Select to adjust BSI mileage (or reset BSI mileage to 0). After the adjustment, do not turn off the ignition switch, directly disconnect the negative pole of the battery as soon as possible, obd wait for 5 minutes;

                    1–4: Connect the negative pole of the battery, and then enter the EEPROM backup function of BSI to read the mileage to see whether the adjustment is successful;

                    1–5: Confirm the BSI is successful adjusted, install the instrument or fuse, turn off the ignition switch and lock the door, wait for. 5 minutes;

                    1–6: Turn on the ignition switch and check whether the instrument mileage is adjusted successfully.

                    2. Only BSI supports the operation steps of OBD calibration:

                    2–1: First backup the data of BSI (remember the file name), so as to recover in case of exception;

                    2–2: Remove the gauge;

                    2–3: Select to adjust BSI mileage (or reset BSI mileage to 0). After the adjustment, do not turn off the ignition switch, directly disconnect the negative pole of the battery as soon as possible, abd wait for 5 minutes;

                    2–4: Connect the negative pole of the battery, and then enter the EEPROM backup function of BSI to read the mileage to see whether the adjustment is successful;

                    2–5: Use XP or other programmer to back up the instrument data, then adjust and install it back on the vehicle;

                    2–6: Turn off the ignition switch and lock the door. After waiting for 5 minutes, turn on the ignition switch to confirm whether the mileage is adjusted successful.

                    3. The BSI type is Delphi, Operation steps:

                    3–1: Press [Read Configuration], be sure BSI manufacturer is DELPHI;

                    3–2: Press [Write FLASH], [Auto update FLASH];

                    3–3: Press [Write Configuration];

                    3–4: Set dashboard to 0 KM;

                    3–5: Set BSI mileage;

                    3–6: Set dashboard mileage;

                    The BSI type is Delphi, Cautions

                    A: It will take 30~60 minutes during testing, keep the vehicle fully charged and don’t unplug 0BD connector. Otherwise it will cause data loss!

                    B: Steps 3–1 to 3–3 you do only once.

                    C: lf the mileage jump back to the mileage before the dashboard is repaired, please perform the following steps:

                    C-1: Remove dashboard;

                    C_2: Set BSI mileage;

                    C-3: Start car and drive 2~3 Km;

                    C-4: Set dashboard mileage;

                    C-5: Put dashboard into car.

                    Technical support: obdexpress.co.uk

                    Thursday, May 12, 2022

                    OBDSTAR MS80 jumper connection guide

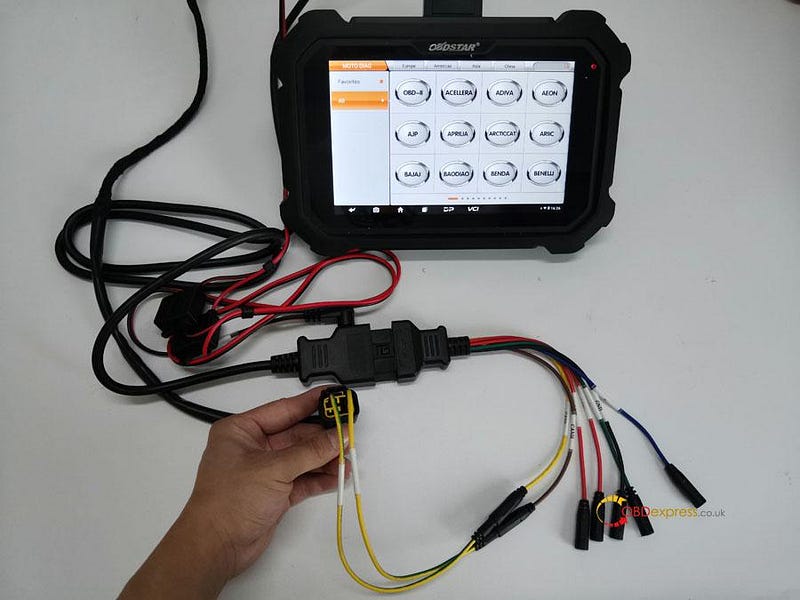
                     Background: When no corresponding diag connector for a motorcycle, M003A can be used for diagnosing.

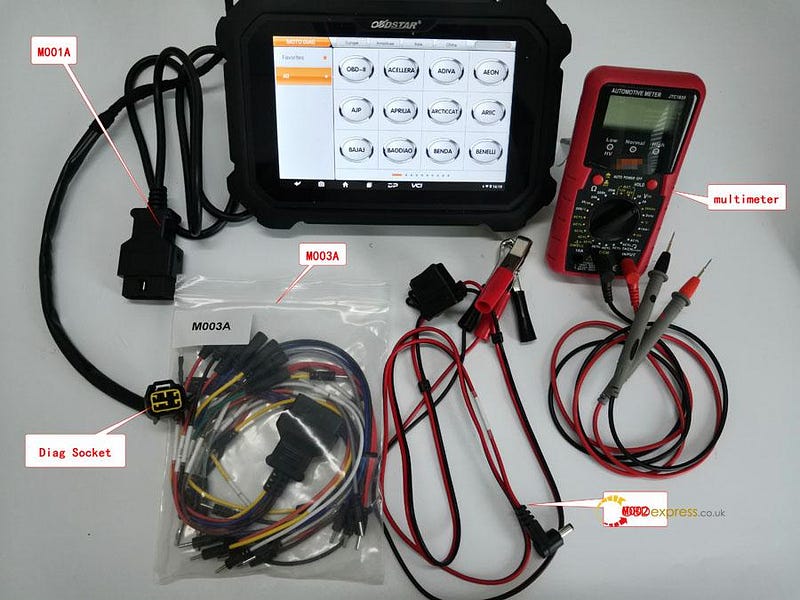
                    Preparation: OBDSTAR MS80, M001A, M003A(Multi-functional Jumper), M002, Multimeter, Cables connecting with Diag Socket. (M001, M003A, M002 are included in the OBDSTAR MS80 package for free)
                    OBDSTAR MS80 jumper connection method

                    Tips: connecting negative pole of an external battery with negative pole of motorcycle via M002A to get power


                    Solutions: Using OBDSTAR M003A to diagnose motorcycle

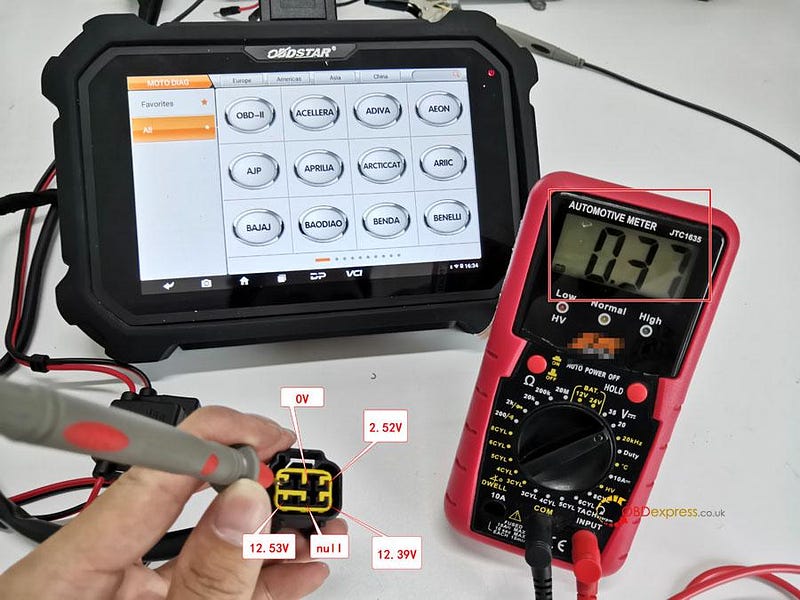
                    Details Steps: Multimeter detects each pin boot's voltage of diag socket.Its voltage reaches DC 20V, the black pen connecting with battery's negative or putting up iron and the red one detecting each pin boot's voltage of diag socket.

                    Battery cable=battery voltage;

                    GND=0V;

                    Communicating cable: K cable (one cable), CAN cables (two cables);

                    K cable: its voltage lower 1–2V than battery

                    CAN cable: CAN-H cable & CAN-L cable, CAN-H cable's voltage ranges from 2.5~3V; CAN-L cable's voltage ranges from 2.0~2.5V.

                    Diagnosing via K cable

                    ①Majority motorcycles are communicating via K cable. Judging from each pin boot's voltage as below, 6 pin boot(12.39V) is for K communicating.

                    OBDSTAR MS80 jumper connection method

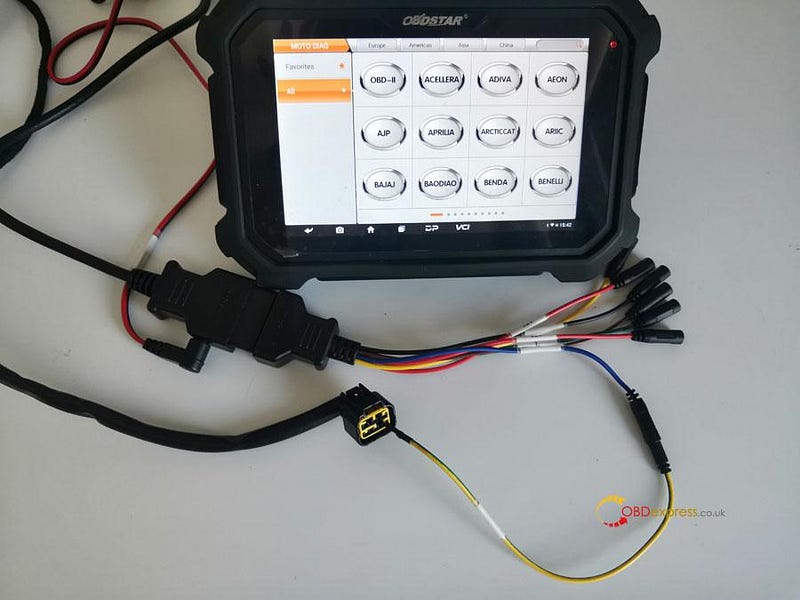
                    ②Connecting M001A with MS80 and M003A, pls connect K cable of M003A with 6 pin boot(12.39V) via 7 cable from M003A. Clipping the black clip of M002 onto battery negative and the red one onto battery positive, then pls connect the other end of M002 onto M001A for charging. Pls ensure the indicator at MS80 upper right is on.

                    Tips: If the indicator at MS80 upper right is off, then it might be 5A fuse has been broken. If a new one is broken again, pls check the motorcycle's voltage is normal.

                    OBDSTAR MS80 jumper connection method

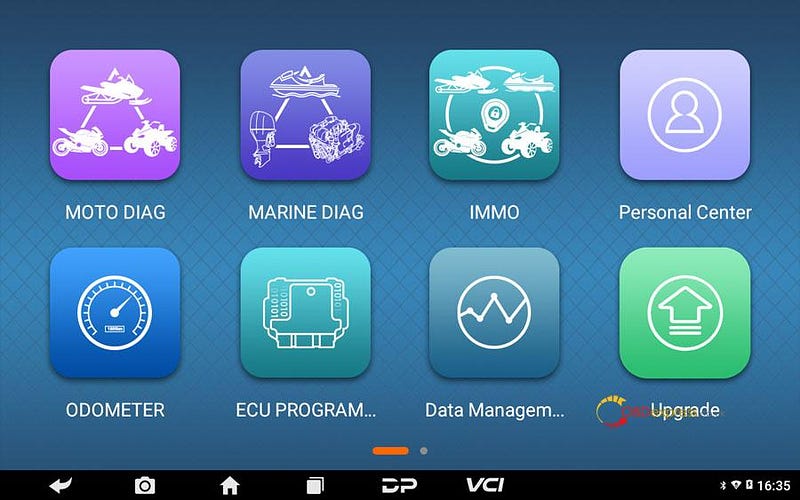
                    ③Click [MOTO DIAG];

                    OBDSTAR MS80 jumper connection method

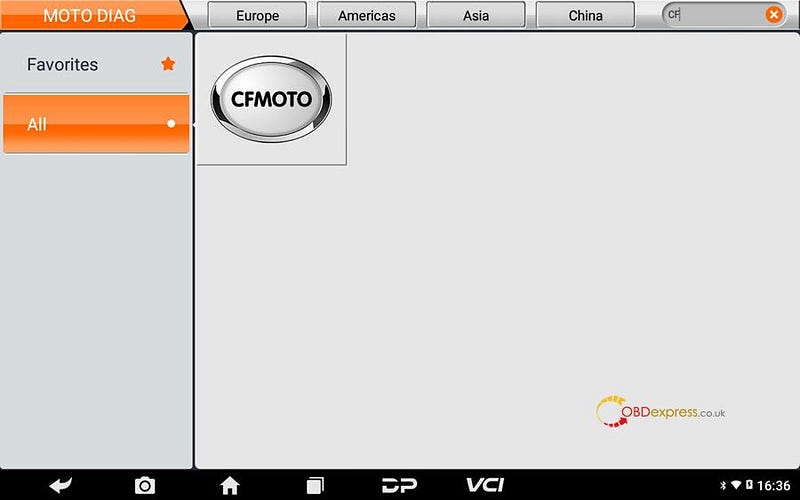
                    ④Click [All], input letters such "CF" in search bar, click [CFMOTO];

                    Tips: by searching keywords, find out related models quickly.

                    OBDSTAR MS80 jumper connection method

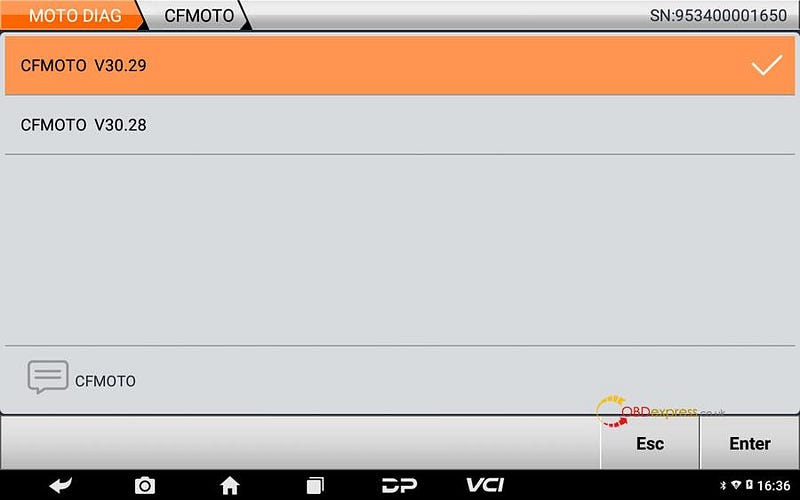
                    ⑤Click the newest CFMOTO edition;

                    OBDSTAR MS80 jumper connection method

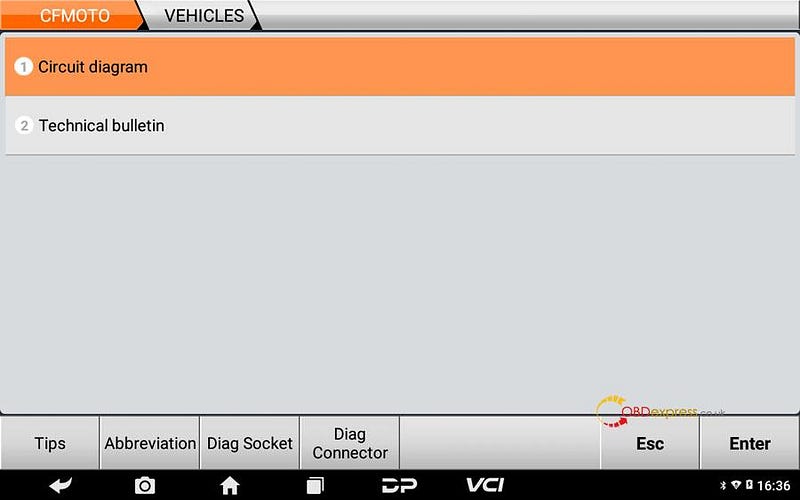
                    ⑥Click [Circuit diagram];

                    OBDSTAR MS80 jumper connection method

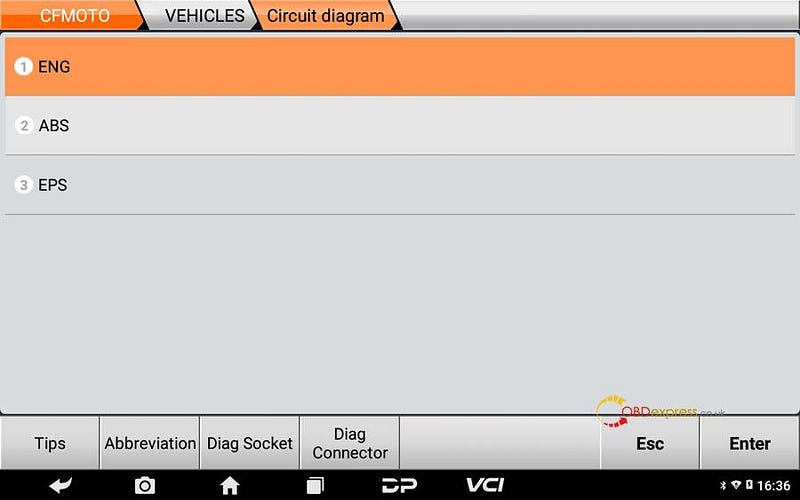
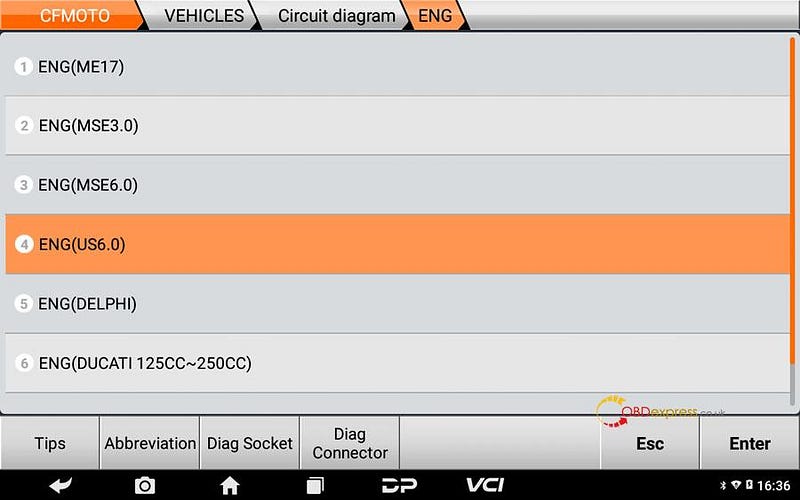
                    ⑦Click [ENG];

                    OBDSTAR MS80 jumper connection method

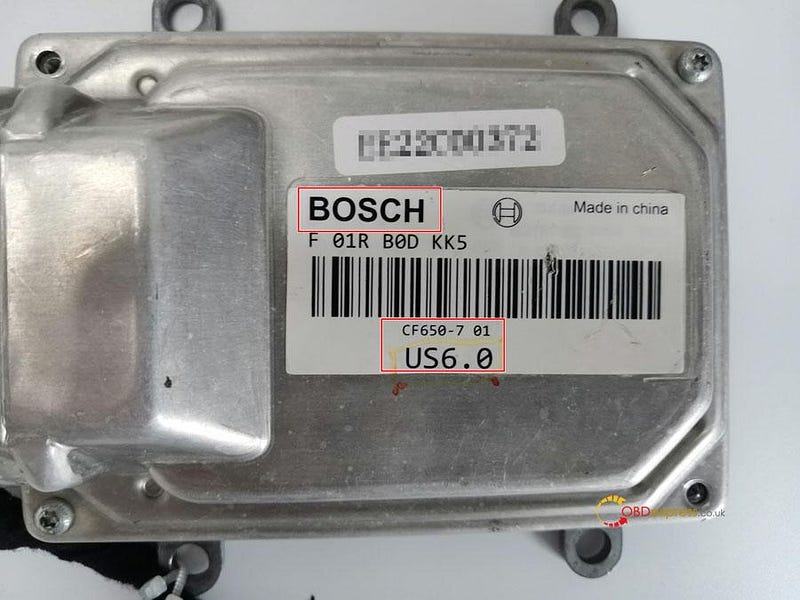
                    ⑧Choose corresponding system with ECU, for example BOSCHUS6.0, then click [ENG(US6.0)];

                    OBDSTAR MS80 jumper connection method
                    OBDSTAR MS80 jumper connection method

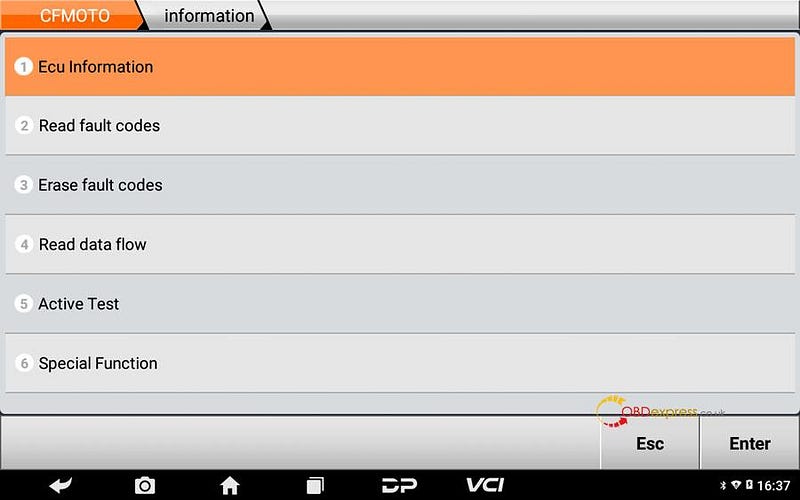
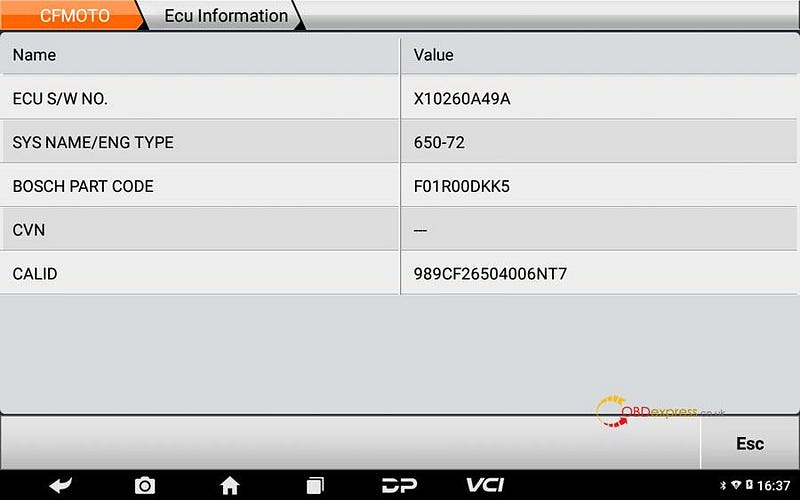
                    ⑨If it can communicate, then the motorcycle is communicating via K cable.

                    OBDSTAR MS80 jumper connection method
                    OBDSTAR MS80 jumper connection method

                    Diagnosing via CAN cables

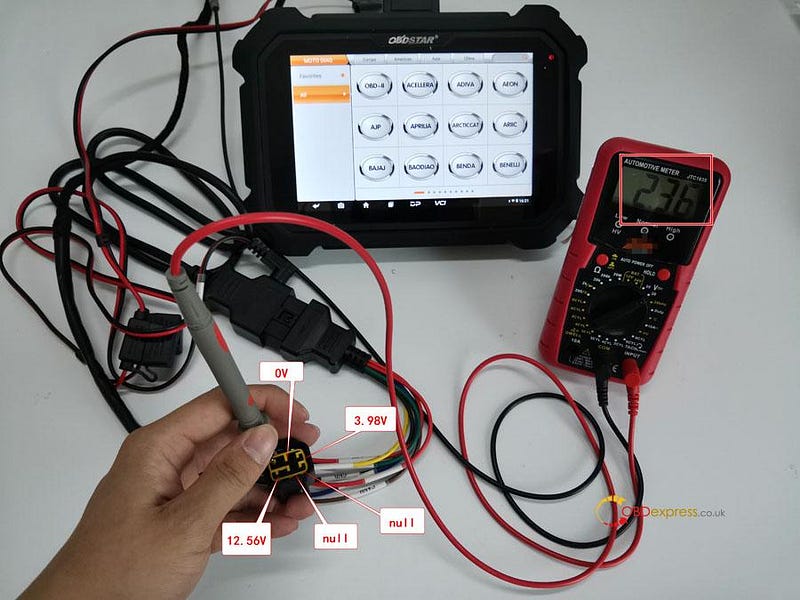
                    ①Judging from each pin boot's voltage as below, 1 pin boot (2.36V) and 3 pin boot (3.98V) are for CAN communicating.

                    OBDSTAR MS80 jumper connection method

                    ②Connecting M001A with MS80 and M003A, pls connect CAN-H cable (brown) of M003A with 3 pin boot (3.98V) via 7 cable from M003A, connect CAN-L cable (yellow) of M003A with 1 pin boot(3.98V) via another 7 cable from M003A. Clipping the black clip of M002 onto battery negative and the red one onto battery positive, then pls connect the other end of M002 onto M001A for charging. Pls ensure the indicator at MS80 upper right is on.

                    Tips: If the indicator at MS80 upper right is off, then it might be 5A fuse has been broken. If a new one is broken again, pls check the motorcycle's voltage is normal.

                    OBDSTAR MS80 jumper connection method

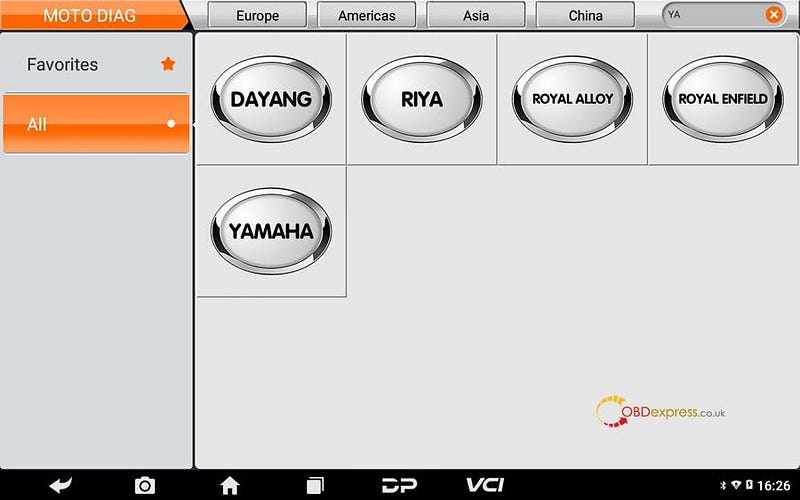
                    ③Click [All], input letters such "YA" in search bar, click [YAMAHA];

                    Tips: by searching keywords, find out related models quickly.

                    OBDSTAR MS80 jumper connection method

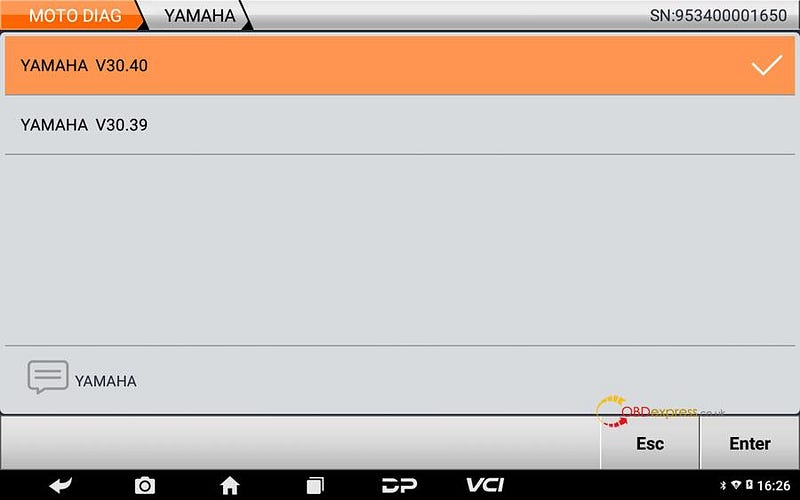
                    ④Click the newest YAMAHA edition;

                    OBDSTAR MS80 jumper connection method

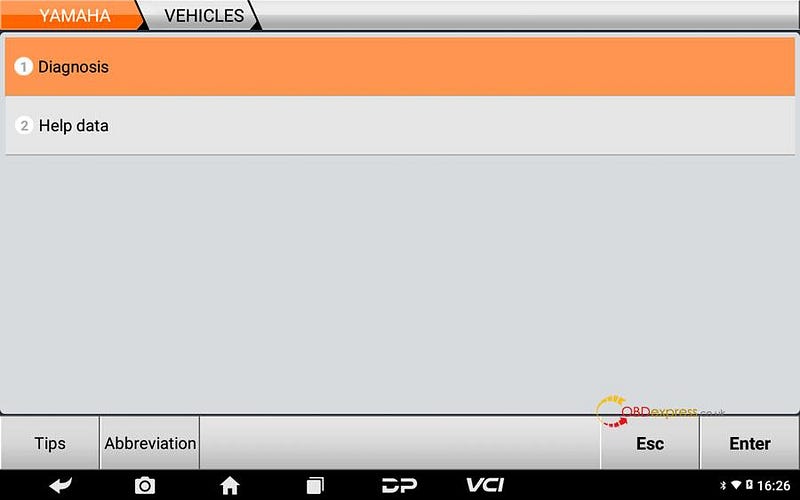
                    ⑤Click [Diagnosis];

                    Tips: help data includes diag socket, diag connector, technical bulletin, wiring diagram help data files.

                    OBDSTAR MS80 jumper connection method

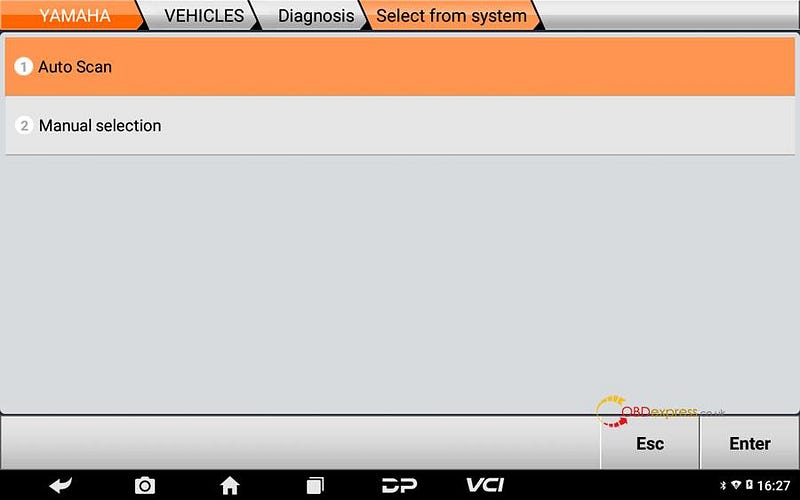
                    ⑥Click [Auto Scan] or [Manual selection];

                    OBDSTAR MS80 jumper connection method

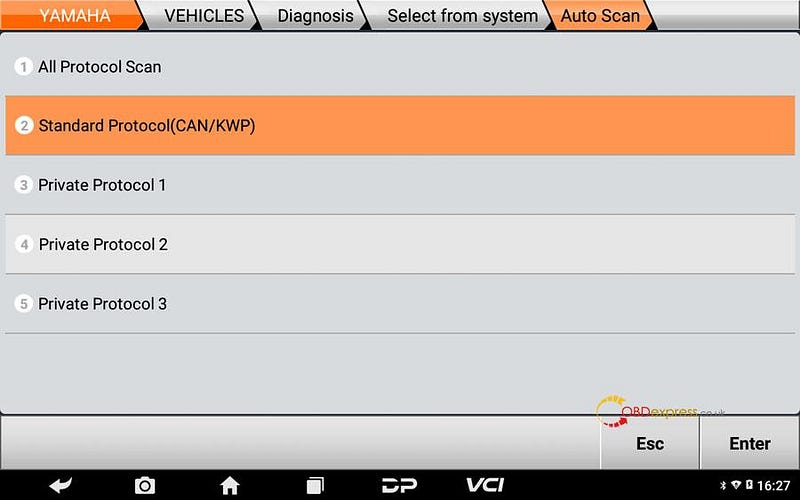
                    ⑦Click [All Protocol Scan] or [Standard Protocol(CAN/KWP)];

                    OBDSTAR MS80 jumper connection method

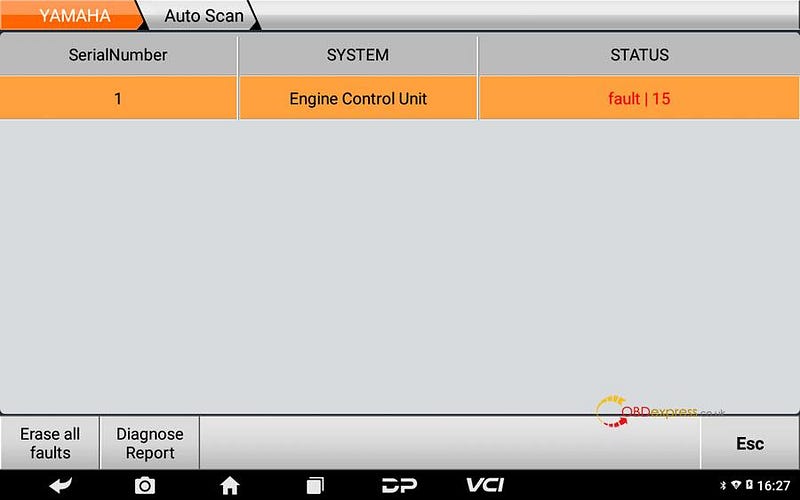
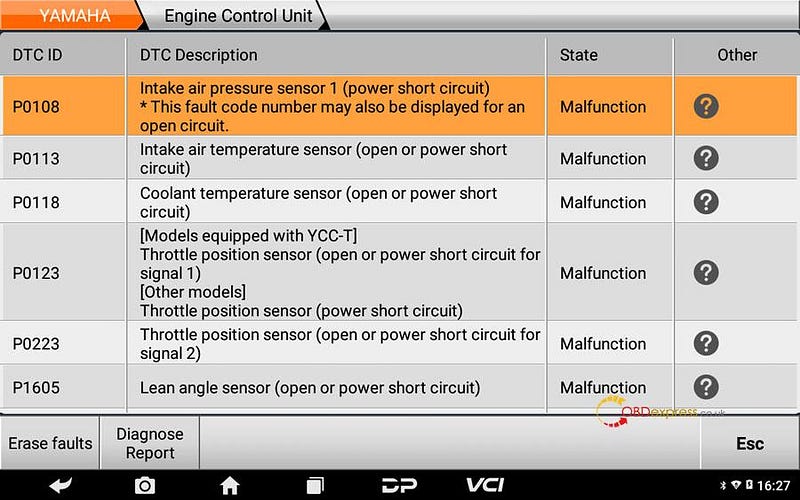
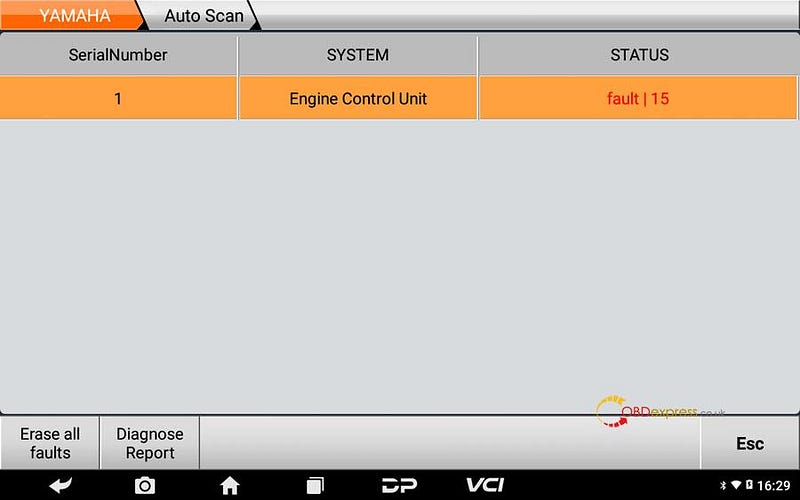
                    ⑧If it can communicate, then the motorcycle is communicating via CAN cables, can click [fault] for more details.

                    OBDSTAR MS80 jumper connection method

                    ⑨Click [?] can check how to solve the fault;

                    OBDSTAR MS80 jumper connection method

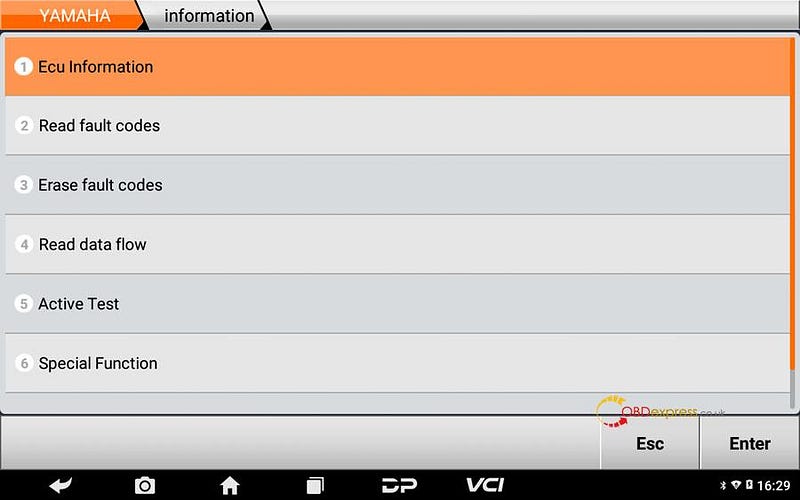
                    ⑩Click [Engine Control Unit] can enter into engine system;

                    OBDSTAR MS80 jumper connection method

                    OBDSTAR MS80 jumper connection method

                    OBDSTAR MS80 jumper connection method

                    ⑪Operations done, the problem got solved.

                    Pls strictly follow your device tips in your operation process. Technical support: obdexpress.co.uk