Pages

OBDSTAR ODOMASTER & X300 PRO4

Wednesday, June 19, 2024

How to Program Volvo XC40 Proximity Key with OBDSTAR X300 Classic G3

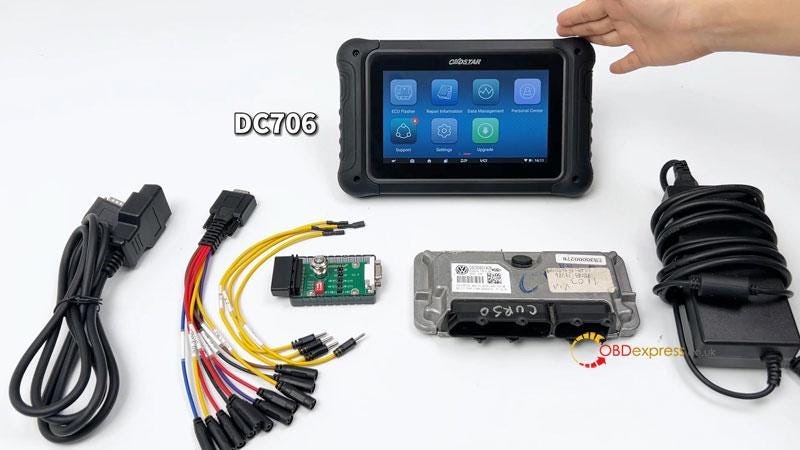
 OBDSTAR X300 Classic G3 programs proximity key to Volvo XC40 perfectly.

Ensure all batteries are fully charged before proceeding.

If the auxiliary battery is below 12V, it must be removed and charged before operating.

Step 1:

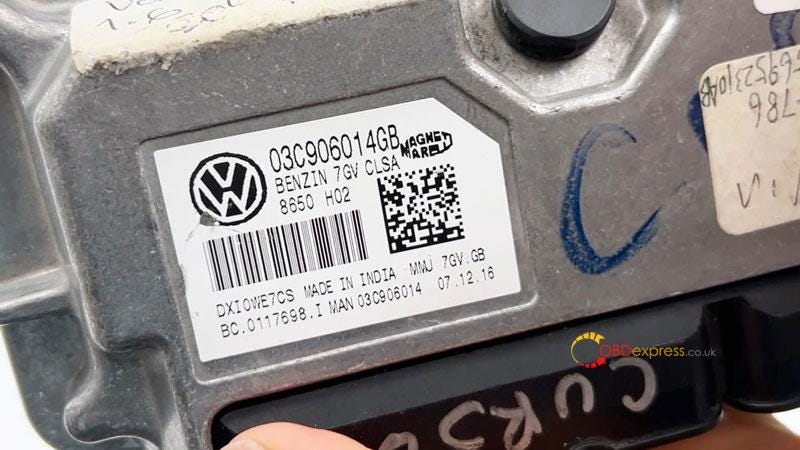
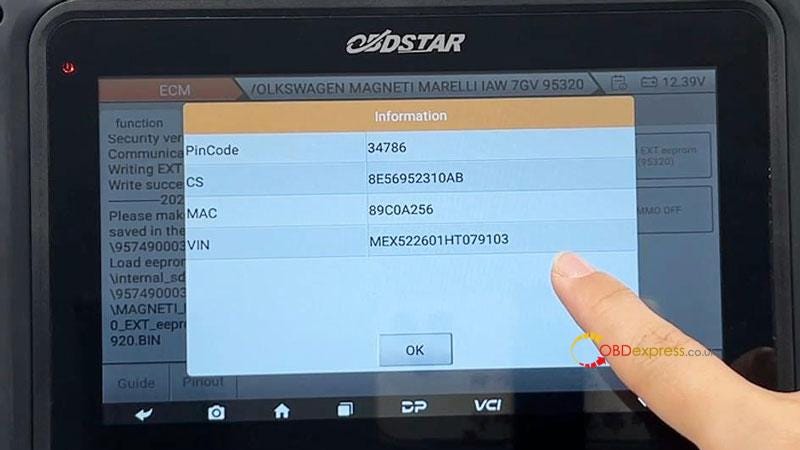
Remove the CEM and read the 10-digit Pincode


OBDSTAR X300 Classic G3 Program VOLVO XC40 Proximity Key

The battery needs to be disconnected before removing the CEM.

Open the CEM casing

Step 2:

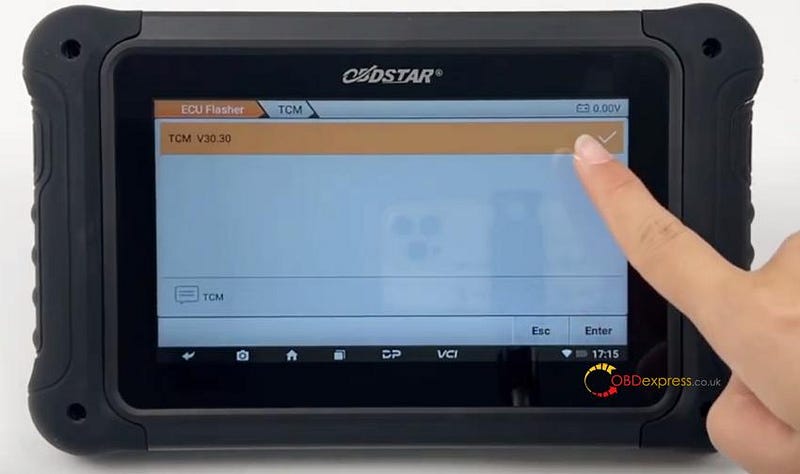
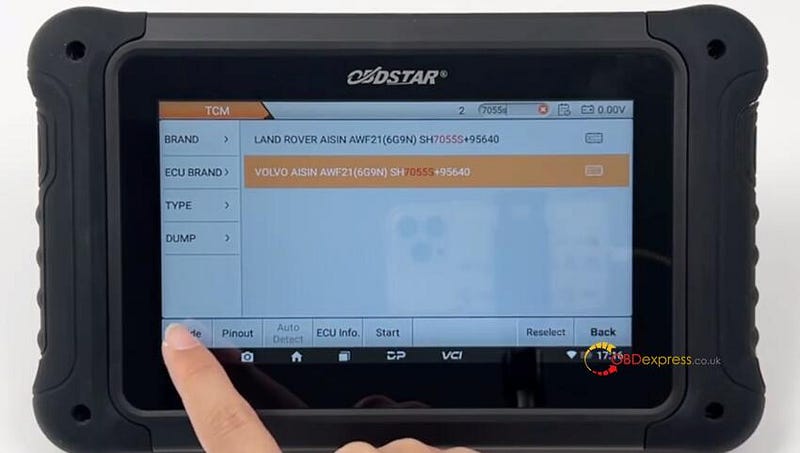
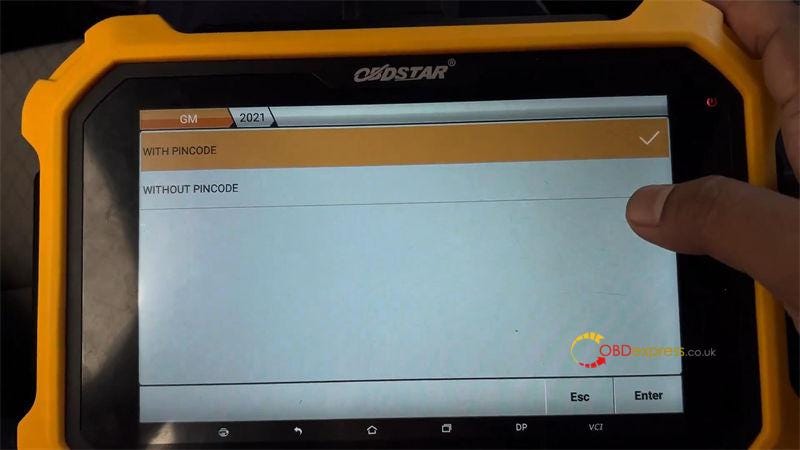
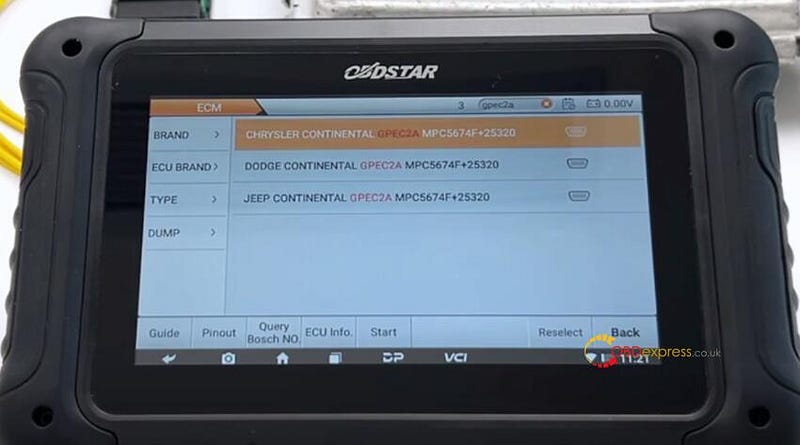
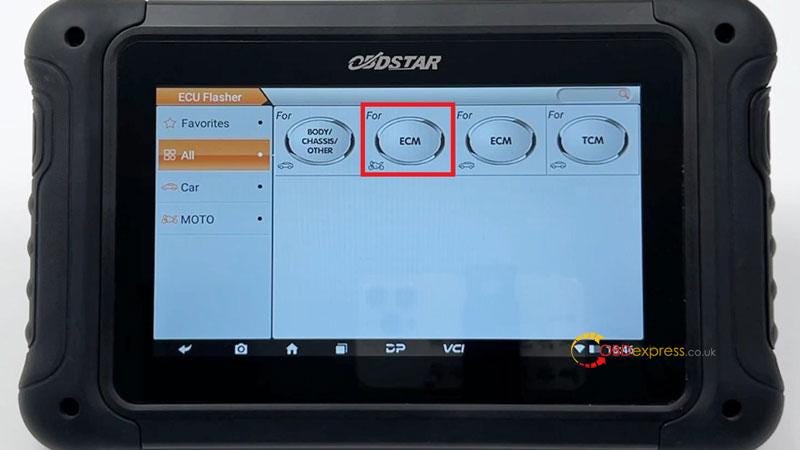
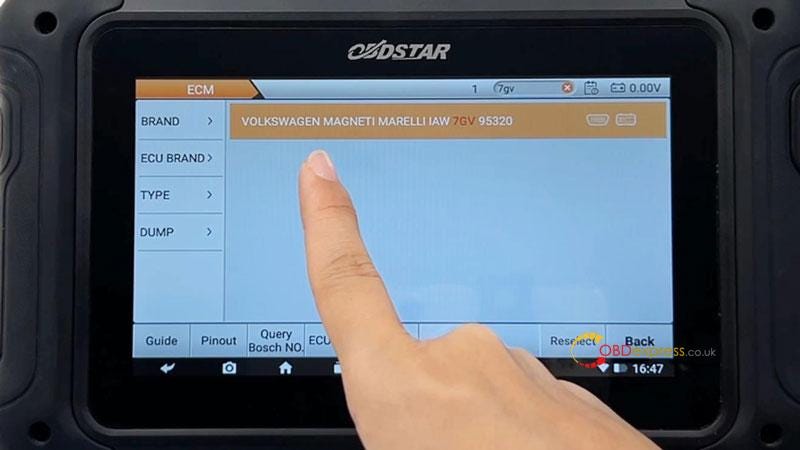
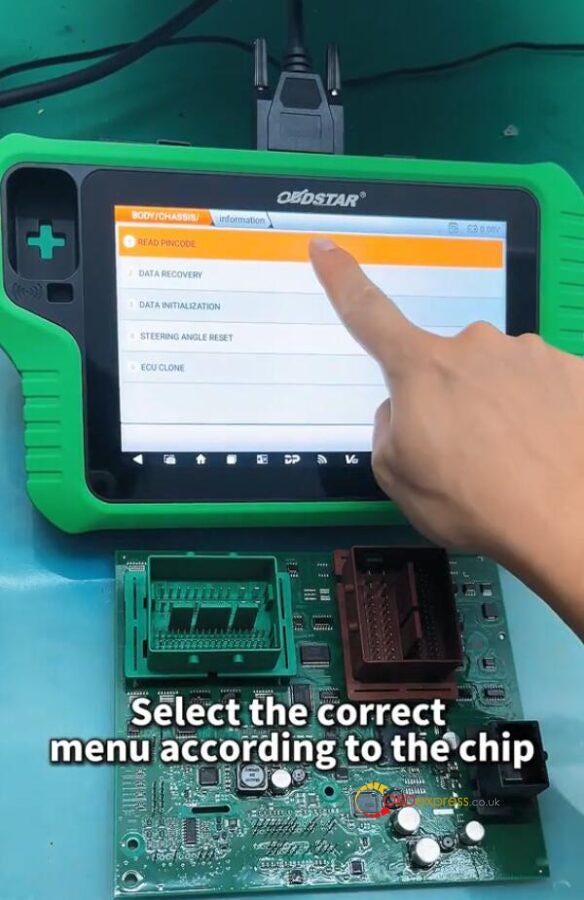
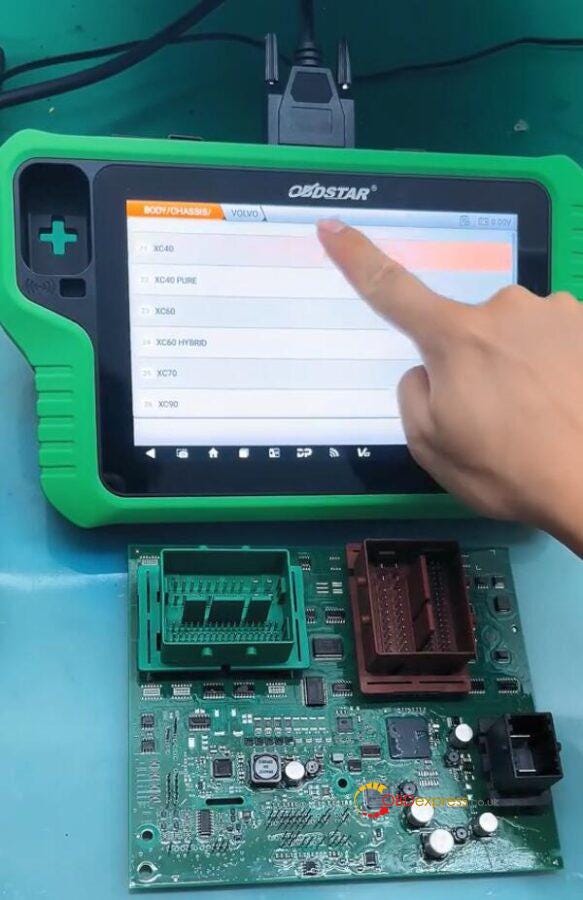
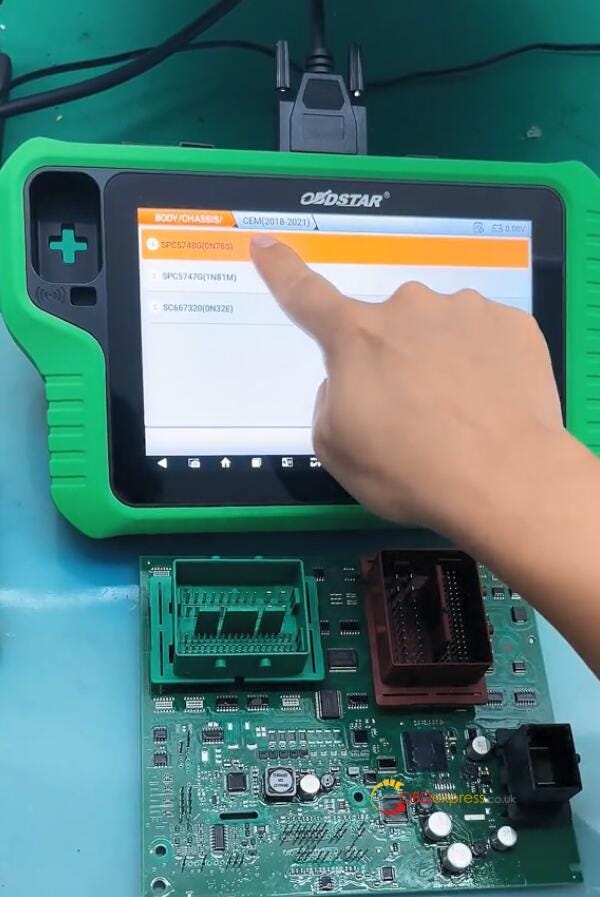
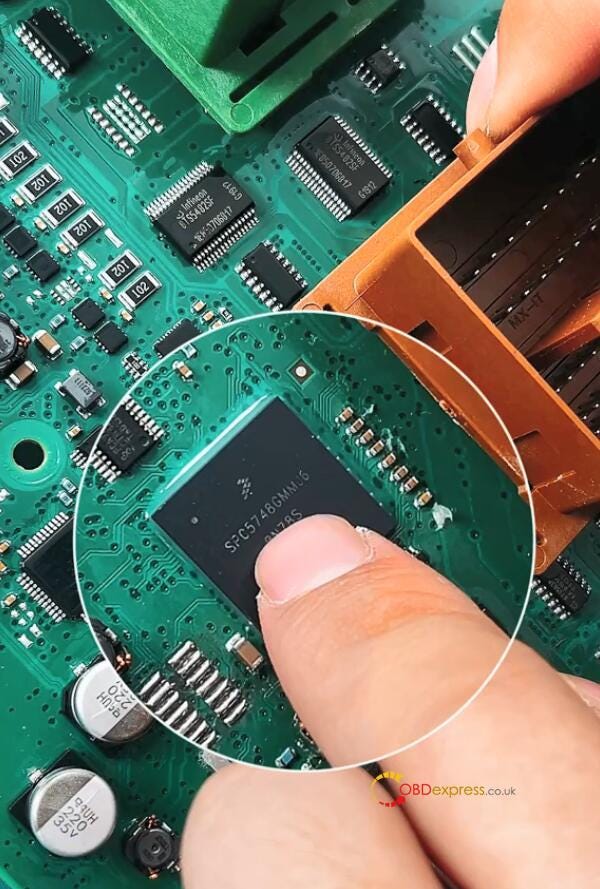
Select BODY/CHASSIC/OTHER>> BODY/CHASSIC/OTHER V30.01>> READ PINCODE>> VOLVO>> XC40>> PROXIMITY>> CEM (2018–2021)>> SPC5748G (0N78S)


OBDSTAR X300 Classic G3 Program VOLVO XC40 Proximity Key

Step 3:

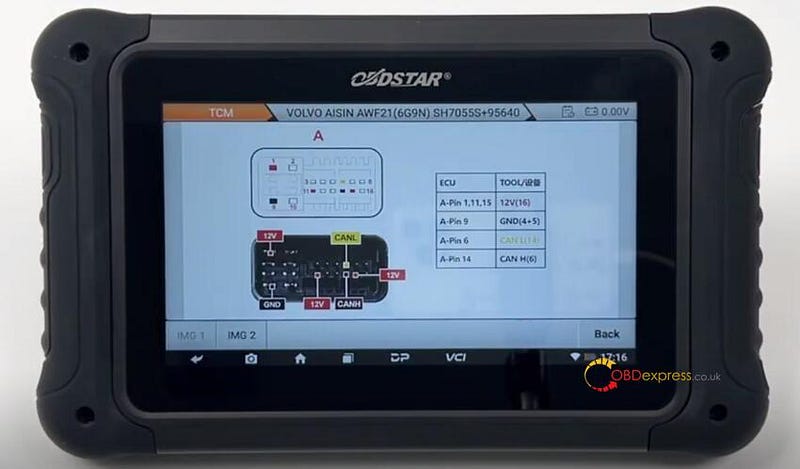
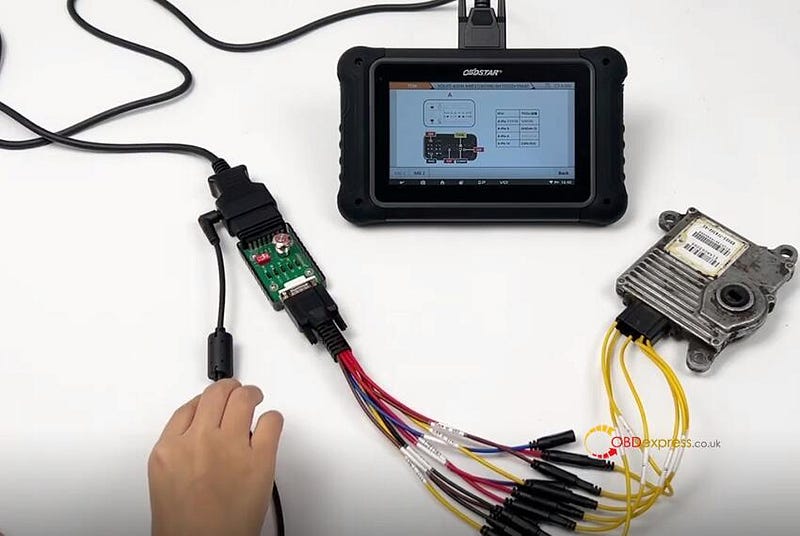
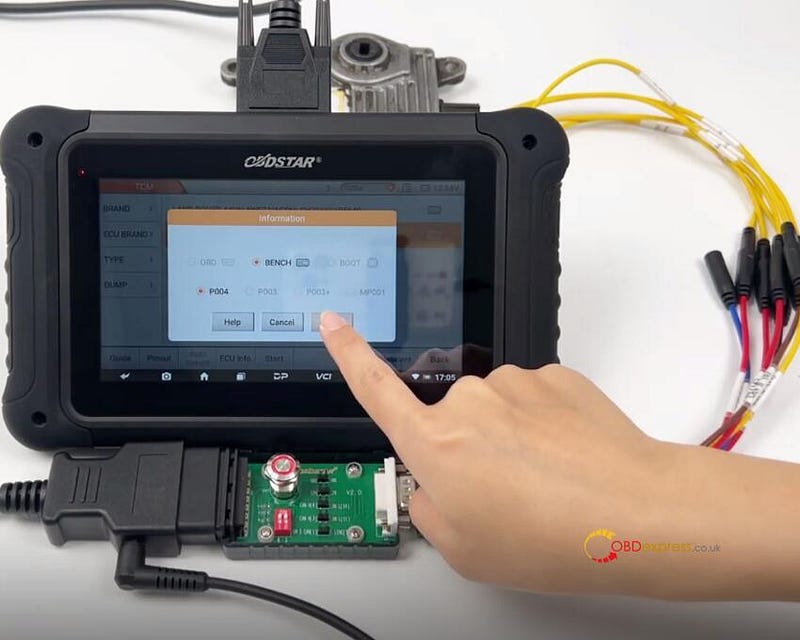
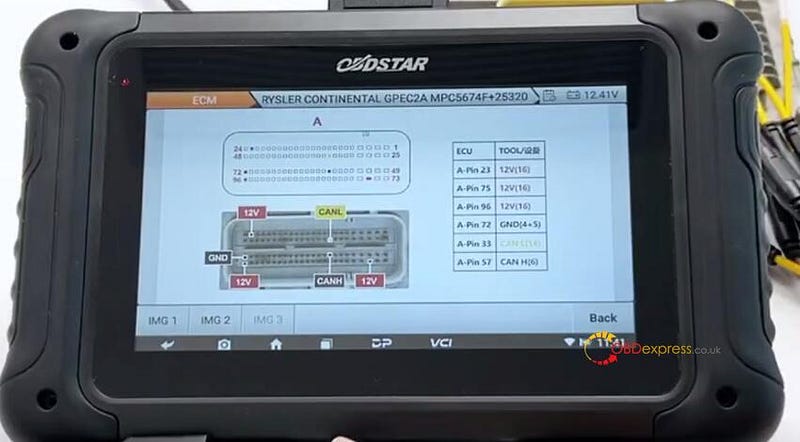
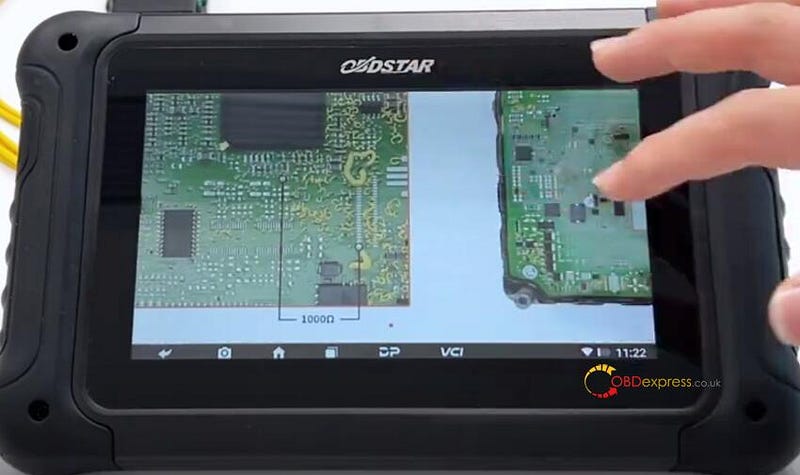
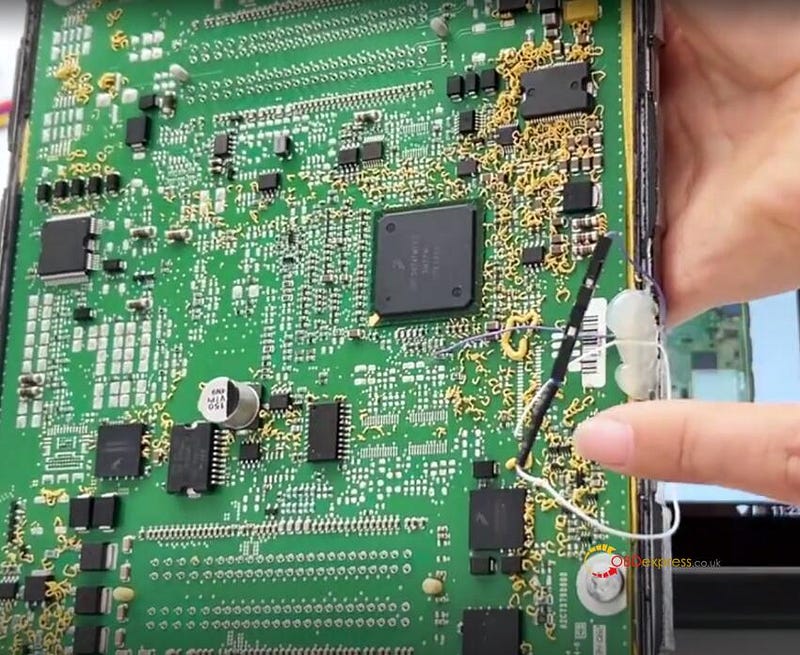
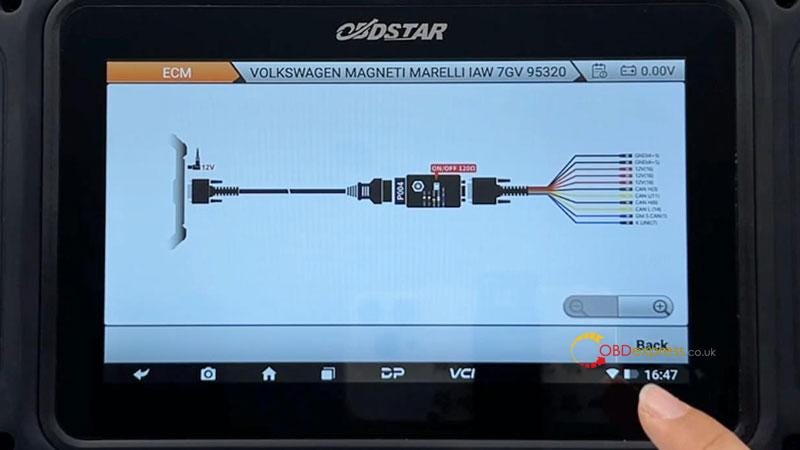
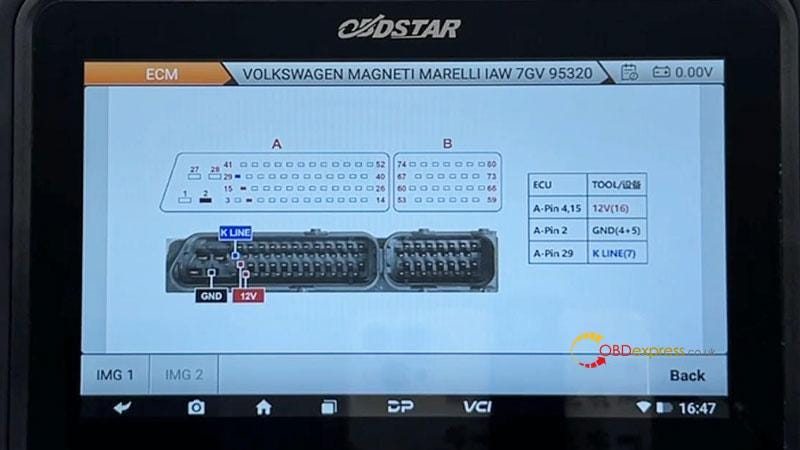
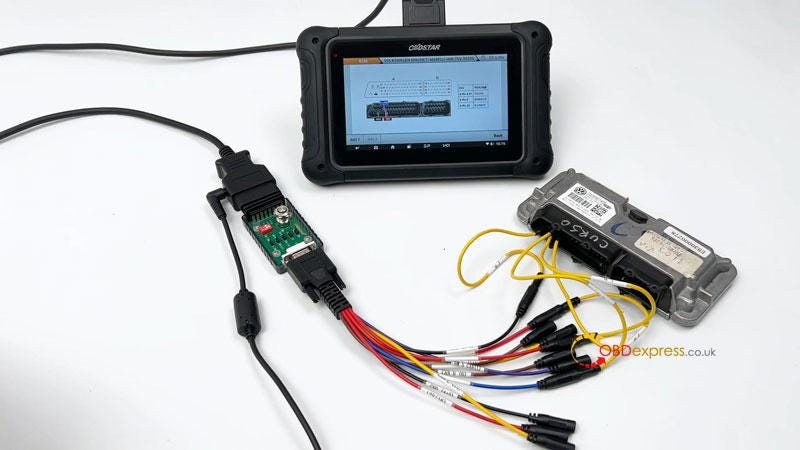
Use OBDSTAR MP001 Programmer to connect X300 Classic G3 key programmer and Volvo CEM according to the wiring diagram


OBDSTAR X300 Classic G3 Program VOLVO XC40 Proximity Key

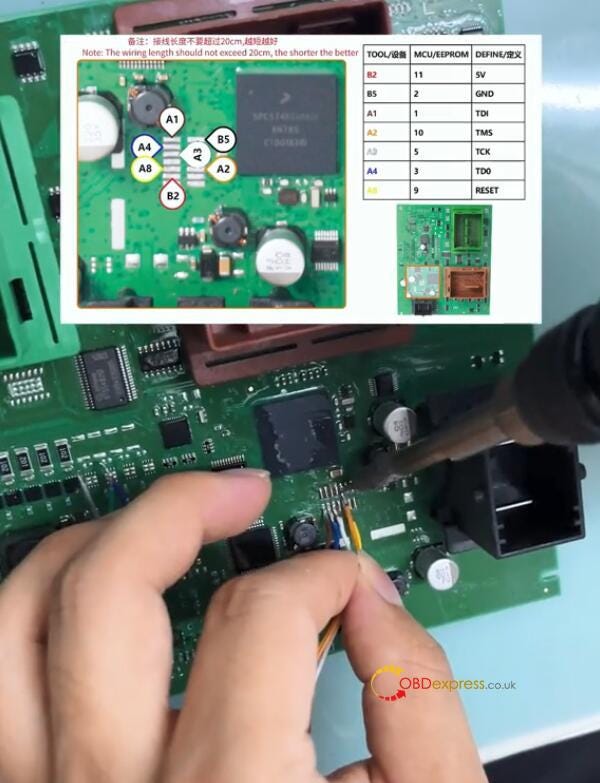
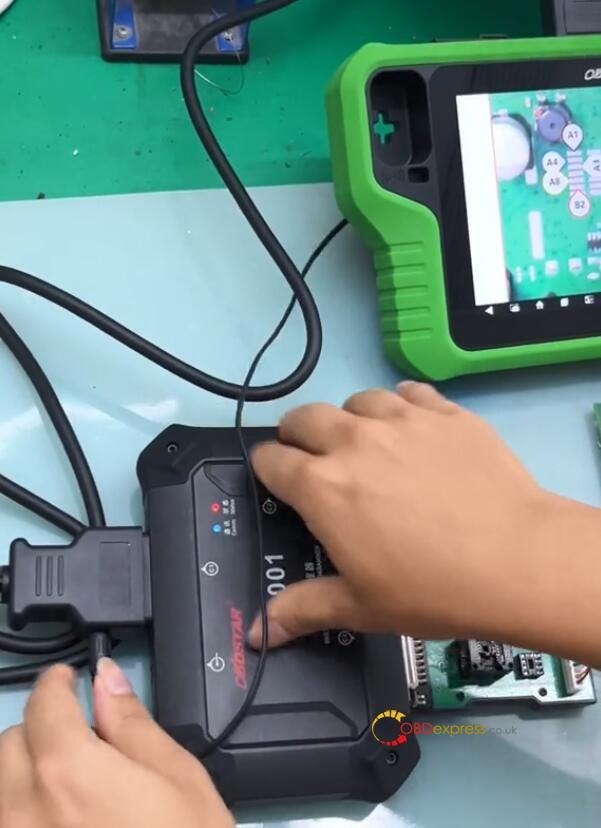
Note: The wiring length should not exceed 20cm, the shorter the better.
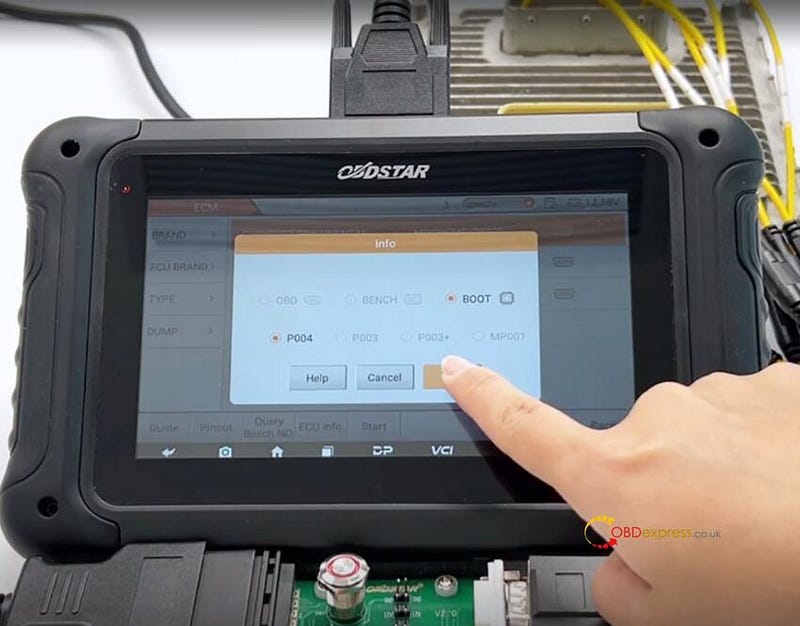
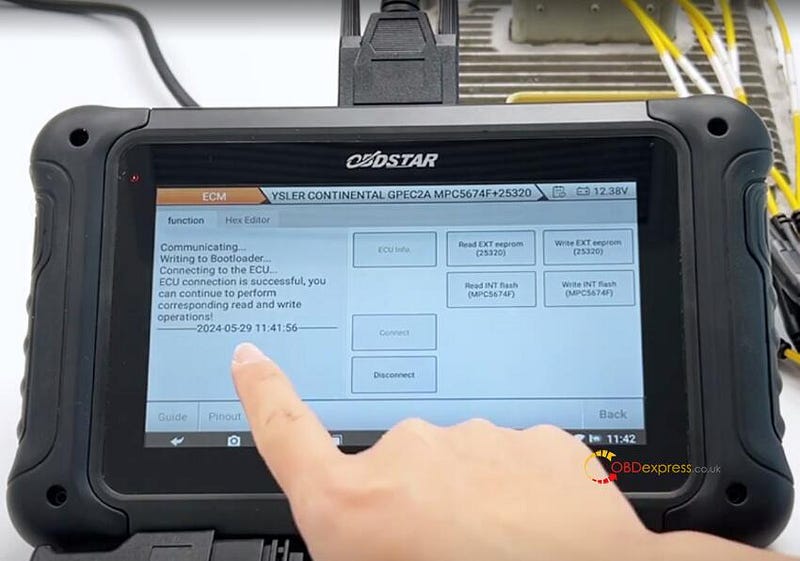
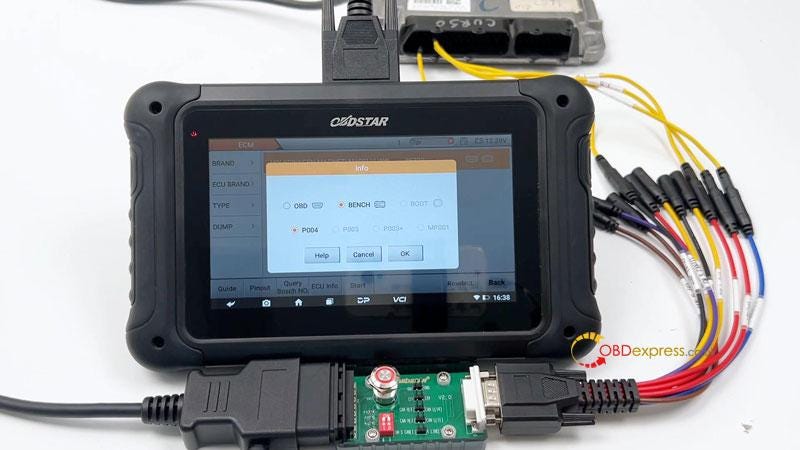
Step 4:

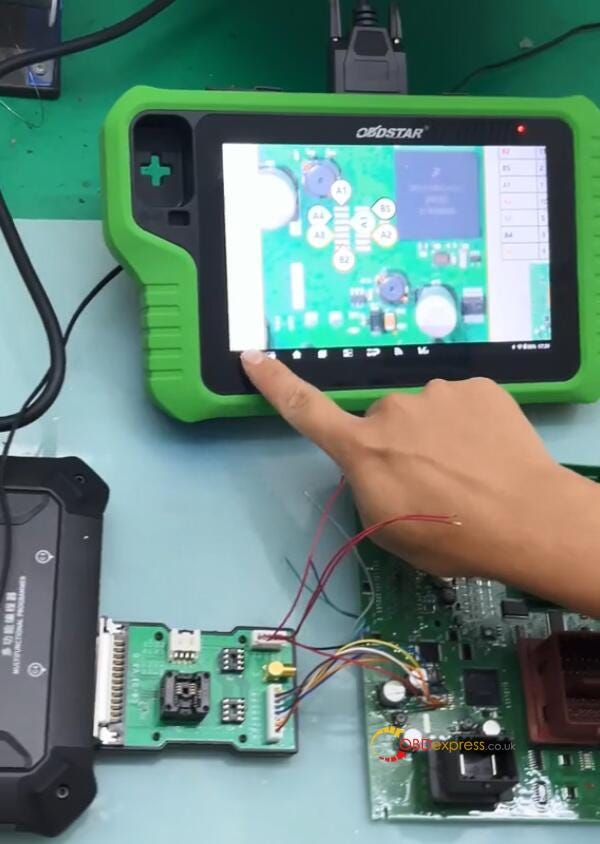
After connection, click [Connect] to connect MP001 and Volvo CEM
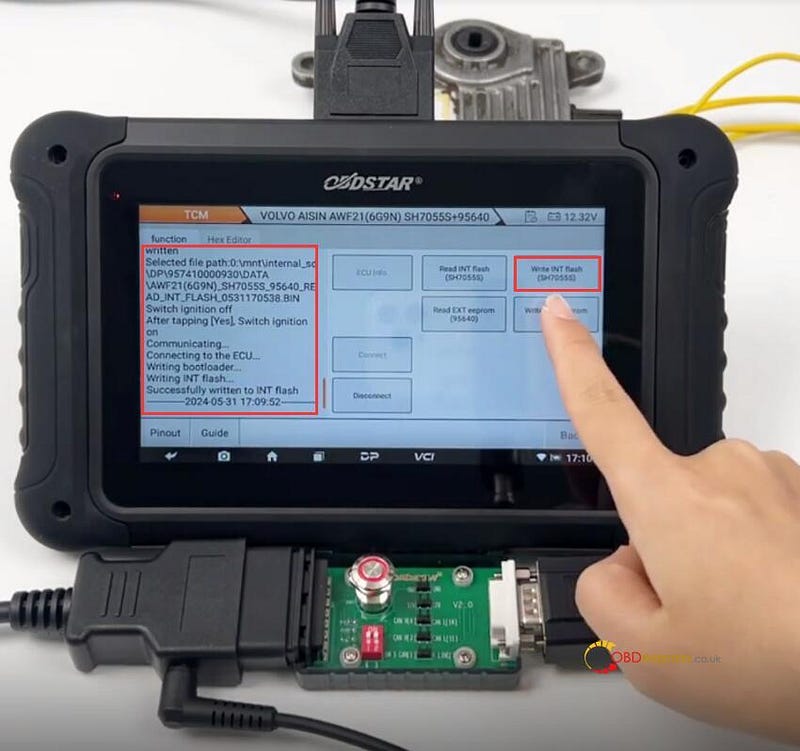
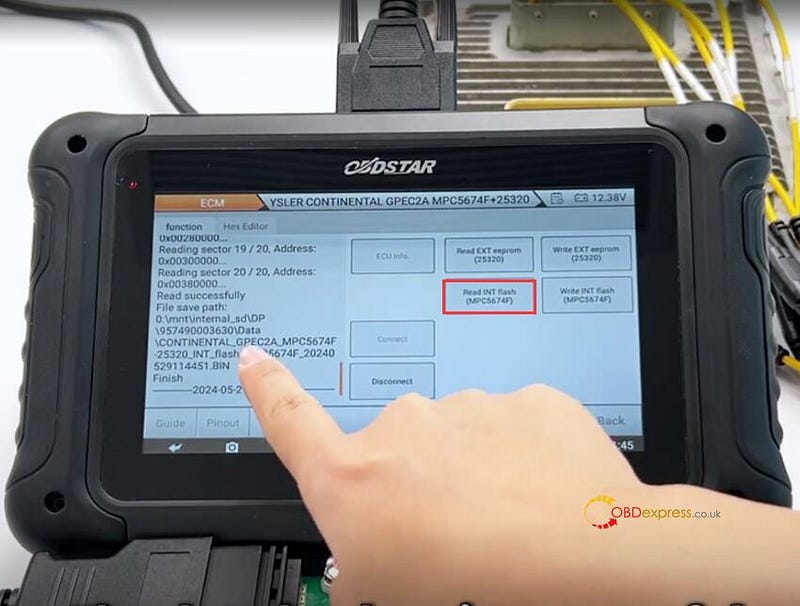
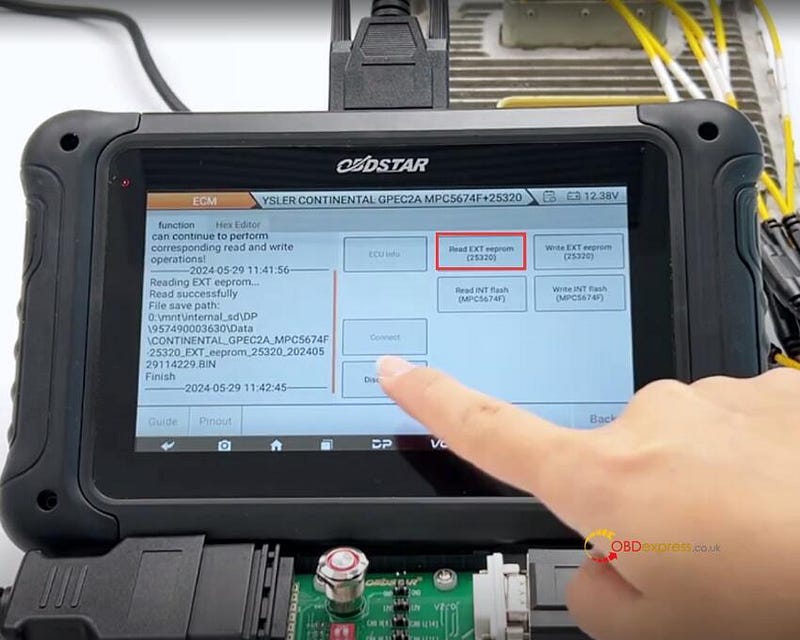
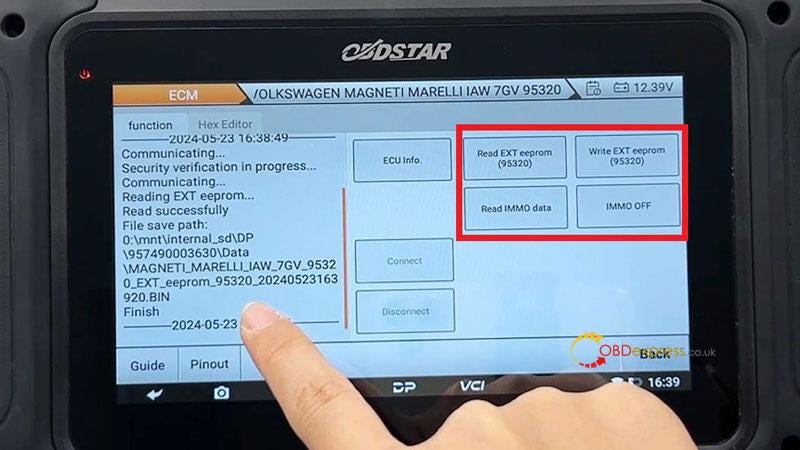
Step 5:

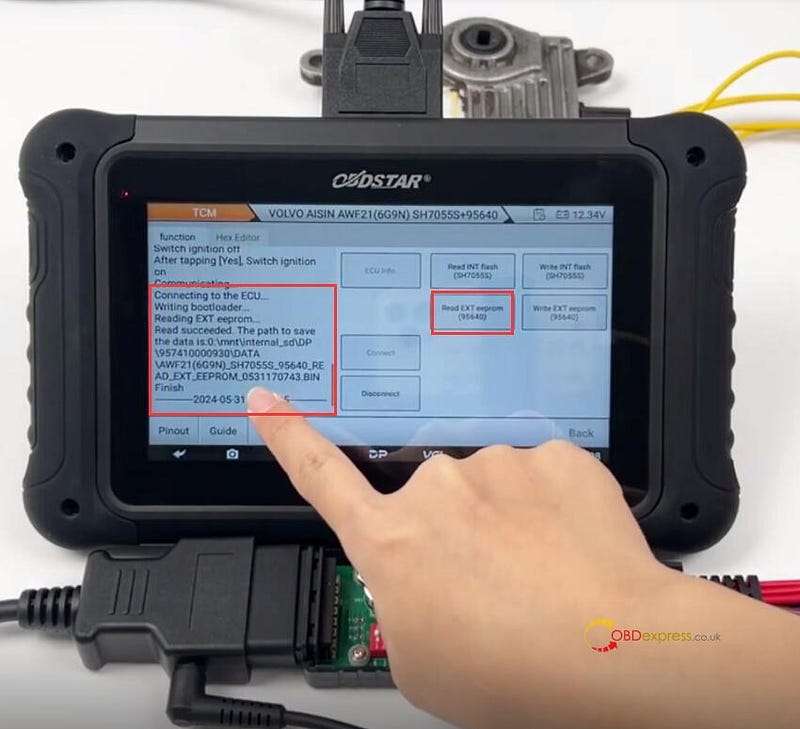
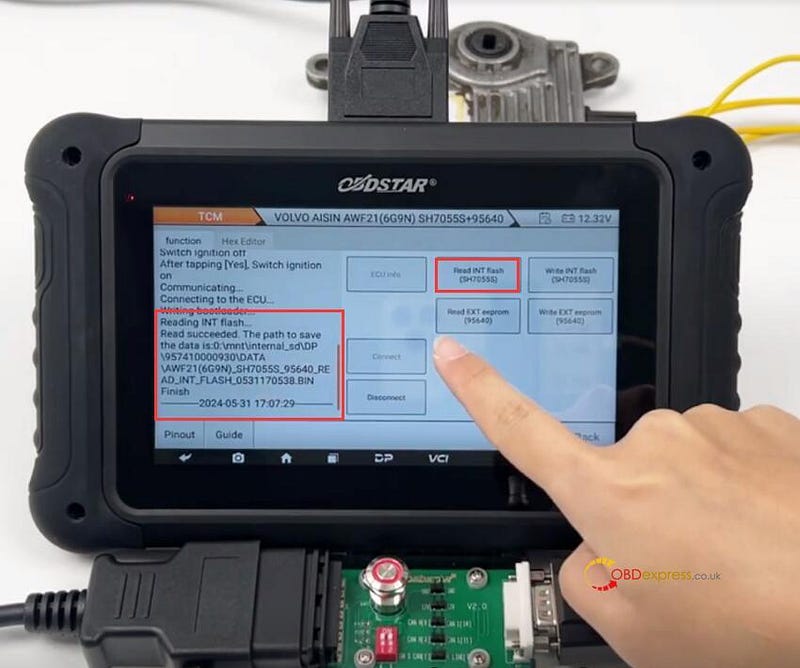
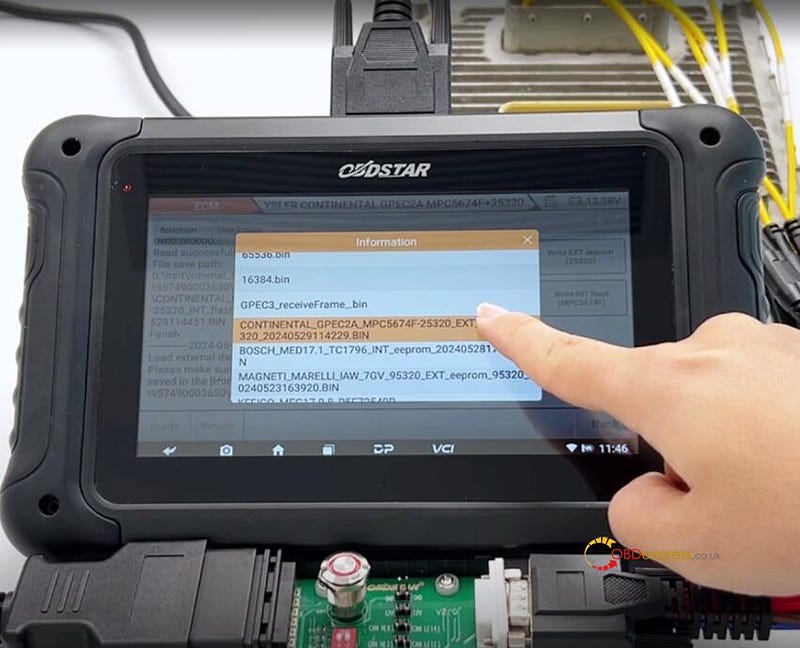
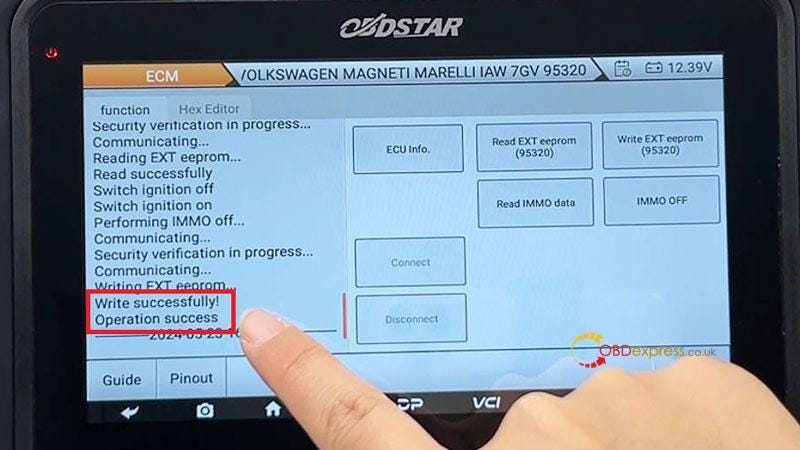
Read IMMO data and save the file
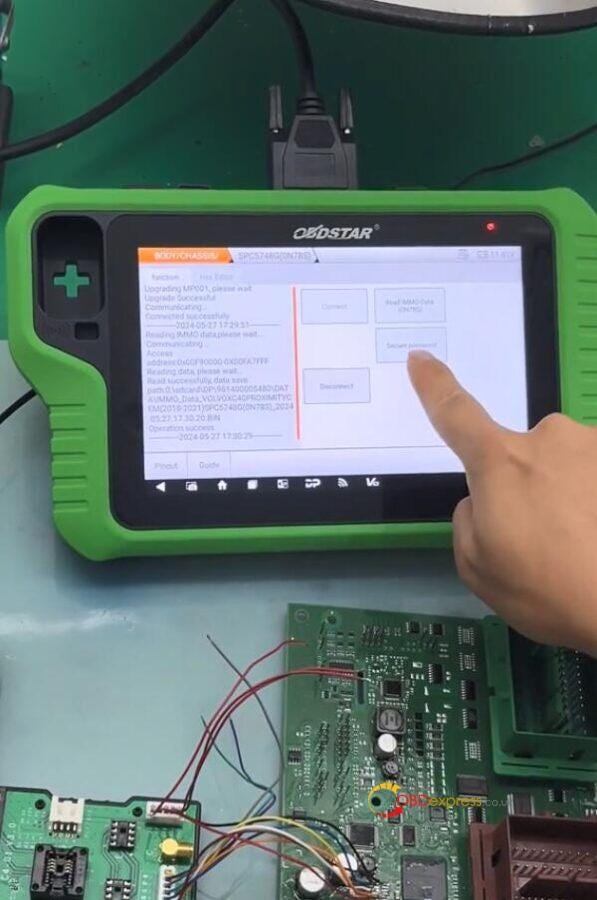
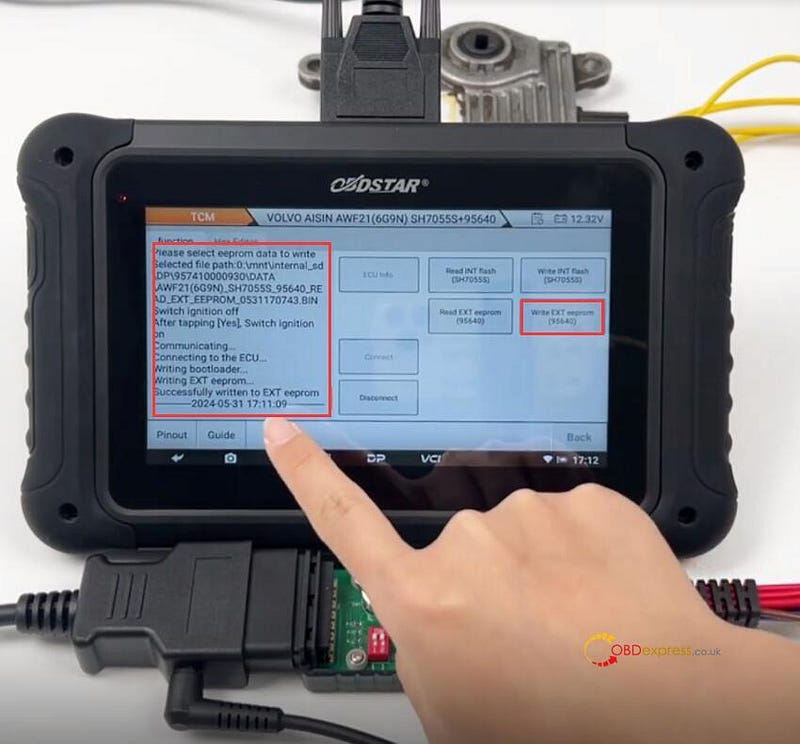
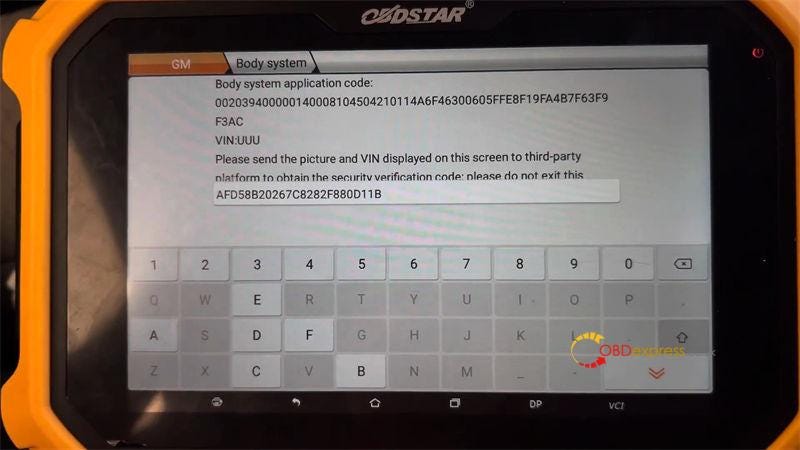

OBDSTAR X300 Classic G3 Program VOLVO XC40 Proximity Key

Step 6:

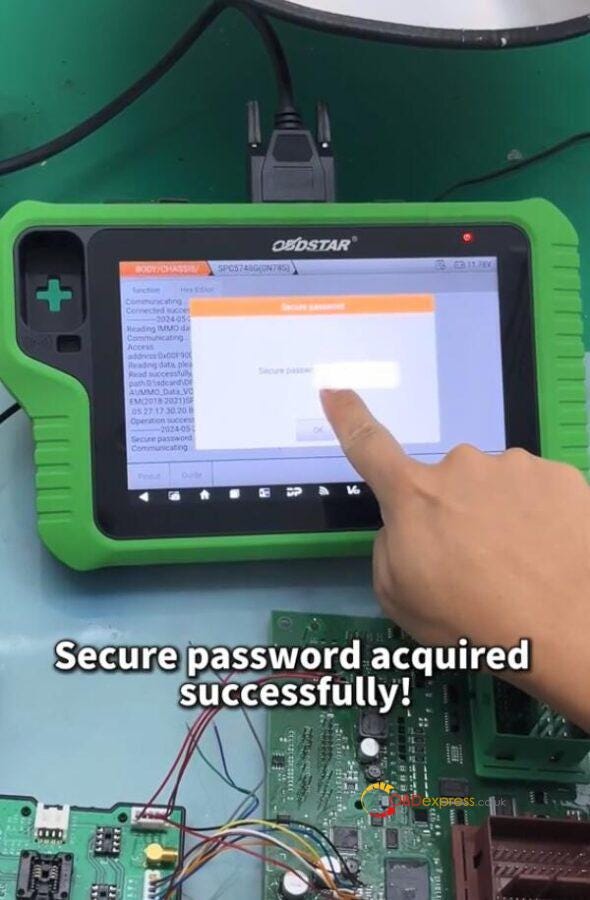
Select the CEM security IMMO data to secure password
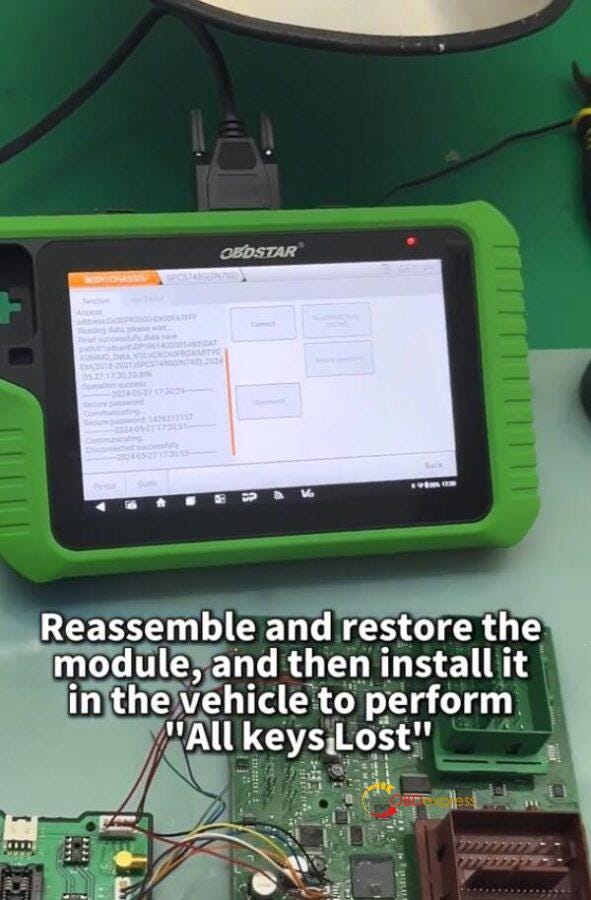
Step 7:

After securing the password successfully, disconnect CEM. Reassemble and restore the CEM module, and then install it in the vehicle to perform [All keys lost] function via OBD.
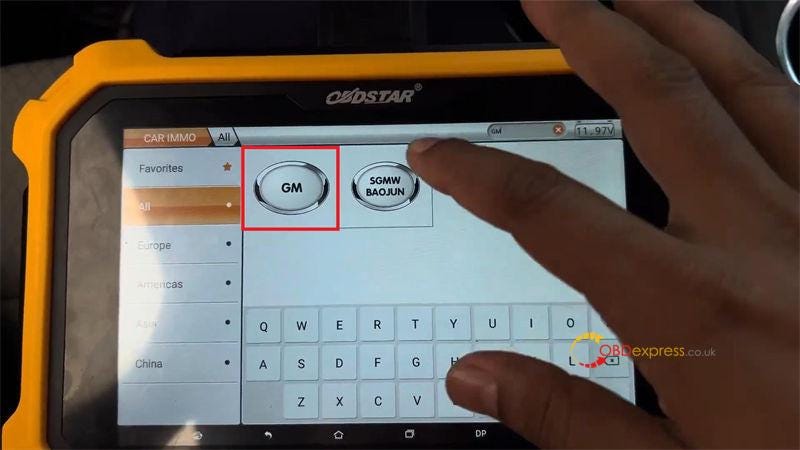
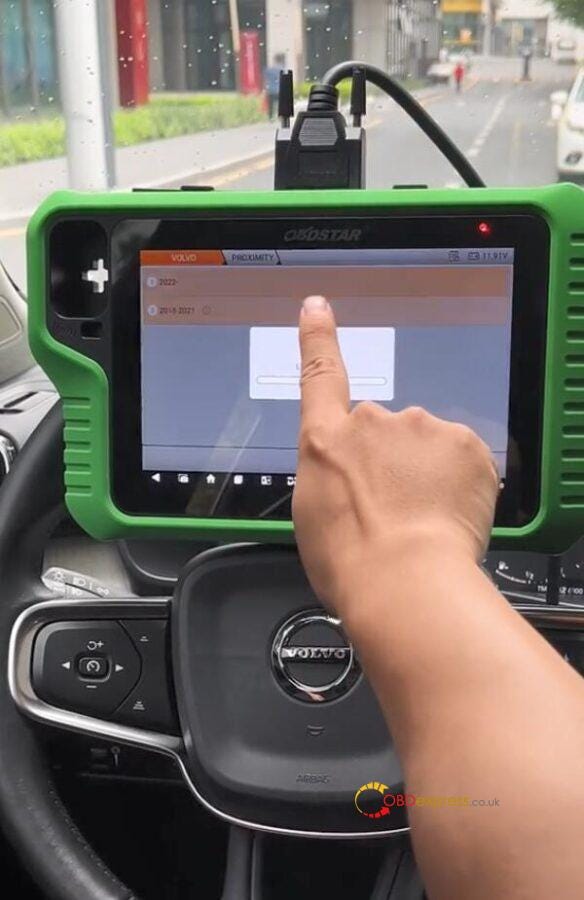

OBDSTAR X300 Classic G3 Program VOLVO XC40 Proximity Key

Step 8:

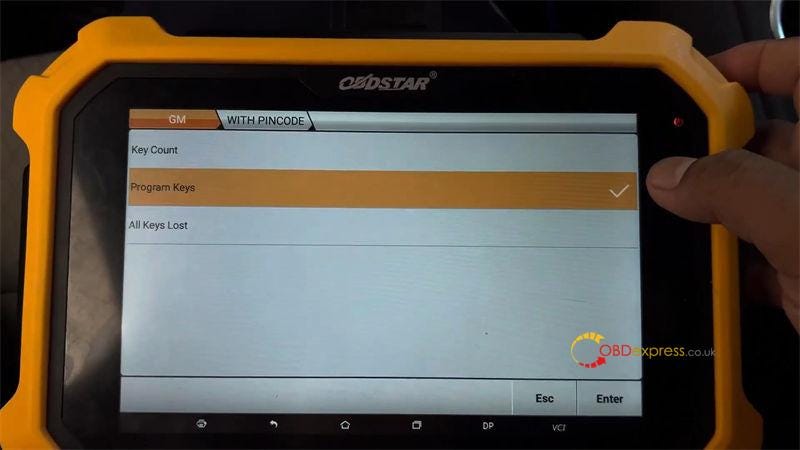
Select IMMO>> VOLVO>> PROXIMITY>> 2018–2021>> All Keys Lost


OBDSTAR X300 Classic G3 Program VOLVO XC40 Proximity Key

Step 9:

Input the CEM security pincode
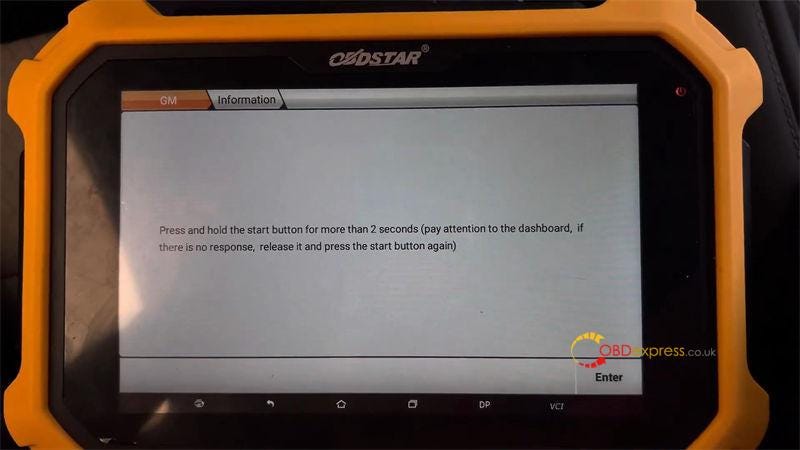
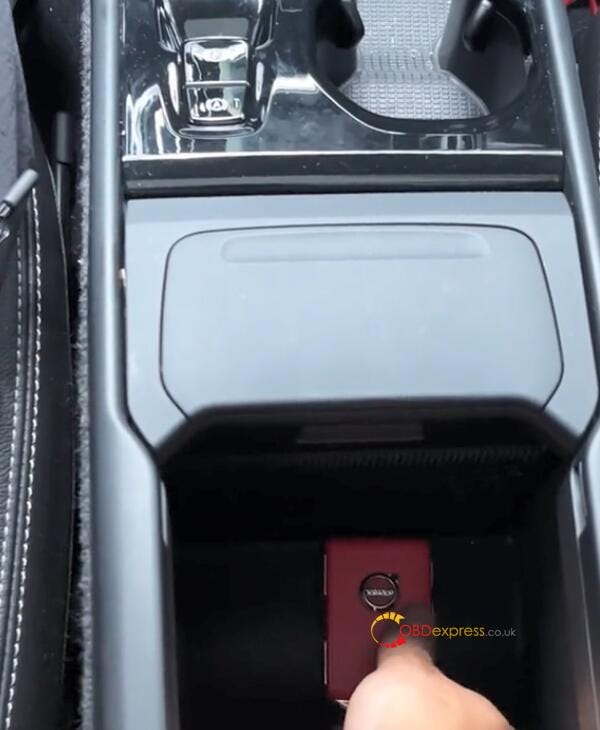

OBDSTAR X300 Classic G3 Program VOLVO XC40 Proximity Key

Step 10:

Program new key according to the on-screen prompt
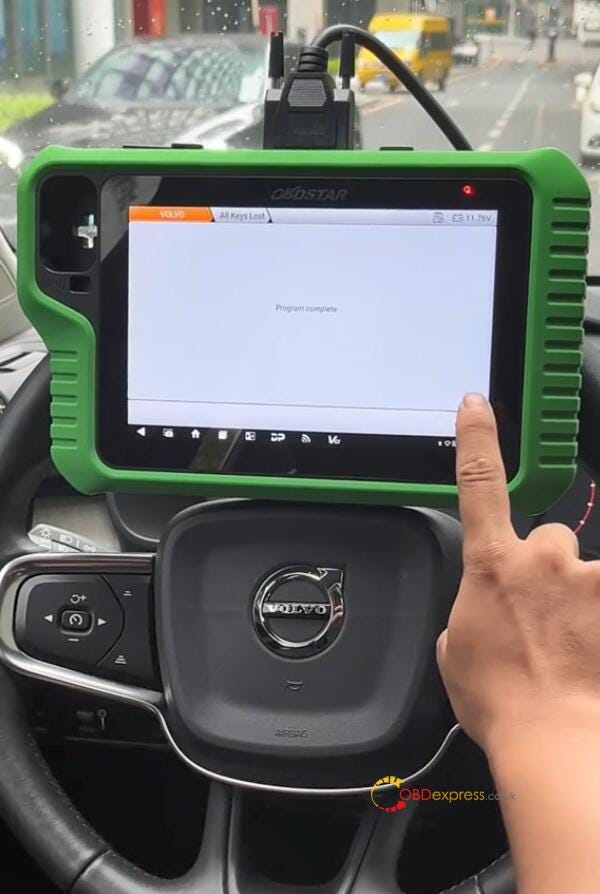
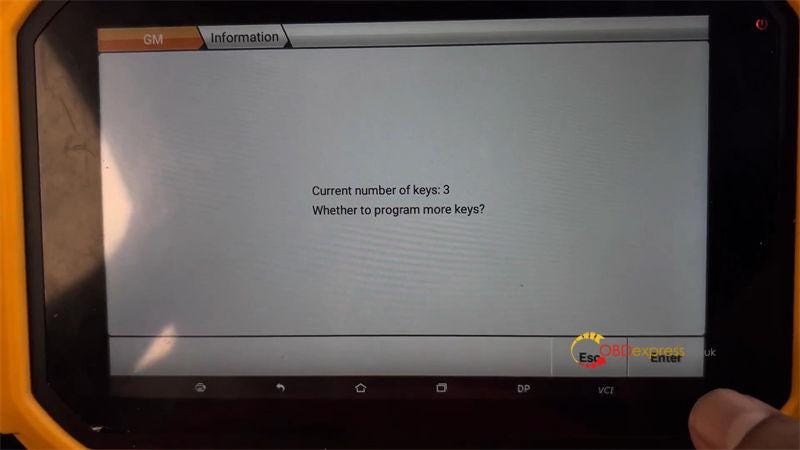

OBDSTAR X300 Classic G3 Program VOLVO XC40 Proximity Key

Step 11:

The key can work well as the original key.

OBDSTAR X300 Classic G3 Key Programmer:

https://www.obdexpress.co.uk/wholesale/obdstar-x300-classic-g3-key-programmer.html


Sunday, June 16, 2024

Bench Method for Cloning VOLVO AISIN AWF21 TCM with OBDSTAR DC706

 How to use OBDSTAR DC706 ECU Tool to clone VOLVO AISIN AWF21 (6G9N) SH7055S TCM?

It can be done by Bench and P004 mode.

To perform this function, need to make sure the network connection is normal and keep the 12V power supply connecting during the process.

Connect OBDSTAR DC706 and Volvo TCM by OBDSTAR P004 Adapter & ECU Clone Jumper and main cable correctly according to the wiring diagram.


VOLVO AISIN AWF21 SH7055S TCM Clone by OBDSTAR DC706 on Bench

Menu function path:

ECU Flasher>> TCM>> TCM V30.30>> VOLVO AISIN AWF21 (6G9N) SH7055S+ 95640


VOLVO AISIN AWF21 SH7055S TCM Clone by OBDSTAR DC706 on Bench

After connection, select Bench and P004 mode


VOLVO AISIN AWF21 SH7055S TCM Clone by OBDSTAR DC706 on Bench

First, connect ECU

Next, read EEPROM data and Flash data separately, then save the data as well


VOLVO AISIN AWF21 SH7055S TCM Clone by OBDSTAR DC706 on Bench

After that, connect DC706 ECU Tool to a new Volvo AISIN AWF21 SH7055S TCM properly

Select the corresponding original TCM data to write into the new TCM


VOLVO AISIN AWF21 SH7055S TCM Clone by OBDSTAR DC706 on Bench

Finally, disconnect the ECU

www.obdexpress.co.uk

How to Program a 2024 GMC Yukon Smart Key with OBDSTAR X300 DP Plus

 Today I’m going to make a 2024 GMC Yukon spare key with OBDSTAR X300 DP Plus by OBD. Before that, I should have to get its pin code from the third-party. The OBDSTAR X300 Classic G3 can also do the job. So let’s see how to do it.


OBDSTAR X300 DP Plus Program 2024 GMC Yukon Smart Key

CAR IMMO >> GM >> Latest version >> Manual select model >> Program keys >> GMC >> USA — CANADA >> YUKON >> PROXIMITY >> 2021 >> WITH PINCODE >> Program key

Please connect OBDII-16 and CANFD connectors at the same time, otherwise the device cannot communicate.

Make sure the ignition switch is turned on. If it can’t be turned on, keep opening/closing the driver’s door every 10s until the instrument responds.

Send the "Engine system application code" to the third-party to obtain the security verification code. And do not exit this interface during the query. Otherwise, you will need to query again.

Enter the pin code once getting it.


OBDSTAR X300 DP Plus Program 2024 GMC Yukon Smart Key

Key Master Plus(X300 DP PLUS) is configuring the system, please wait for about 10 mins…

Current number of keys: 2

Put the new proximity key into the sensing area(in the second round hole of the cup holder), take the other keys out of the car.

Press and hold the start button for more than 2s(pay attention to the dashboard, if there is no response, release it and press the start button again).

Current number of keys: 3

Whether to program more keys? No

Press and hold the start button for 16s, until the dashboard prompts: remote control key learning is complete.

Release the start button.

Turn off the ignition switch, open and close the door just once.

Configuring the system, please wait…

Program complete.

Test the new key. It’s fine and working.

Done.


OBDSTAR X300 DP Plus Program 2024 GMC Yukon Smart Key

www.obdexpress.co.uk

Wednesday, June 12, 2024

OBDSTAR DC706: Read/Write Chrysler Continental GPEC2A ECU

 OBDSTAR DC706 clone Chrysler Continental GPEC2A ECU via BOOT successfully!

Requirement:

1.Update ECM software to V30.70


Chrysler Continental GPEC2A ECU Read and Write with OBDSTAR DC706

2.Need accessories incl.P004 Adapter and P004 ECU Clone Jumper, main cable and 12V power supply


Chrysler Continental GPEC2A ECU Read and Write with OBDSTAR DC706

3.Keep charging to OBDSTAR P004 Adapter, and make sure the network connection is normal during the operation

Operation:

Select ECU Flasher>> ECM>> ECM V30.70>> gpec2a>> Chrysler Continental GPEC2A MPC5674F+25320


Chrysler Continental GPEC2A ECU Read and Write with OBDSTAR DC706

Need to connect 12V cables (3 cables), GND (4+5), CAN L (14) and CAN H (6) cables

ECUTOOLA-Pin 2312V (16)A-Pin 7512V (16)A-Pin 9612V (16)A-Pin 72GND (4+5)A-Pin 33CAN L (14)A-Pin 57CAN H (6)

Connect 1000Ω


Chrysler Continental GPEC2A ECU Read and Write with OBDSTAR DC706

Connect DC706 ECU Tool and GPEC2A ECU properly according to the wiring diagram


Chrysler Continental GPEC2A ECU Read and Write with OBDSTAR DC706

Select BOOT and P004 mode, and turn on the switch button of P004 Adapter


Chrysler Continental GPEC2A ECU Read and Write with OBDSTAR DC706

Connect ECU- OK


Chrysler Continental GPEC2A ECU Read and Write with OBDSTAR DC706

Read EXT EEPROM (25320)- OK


Chrysler Continental GPEC2A ECU Read and Write with OBDSTAR DC706

Read INT flash (MPC5674F)- OK


Chrysler Continental GPEC2A ECU Read and Write with OBDSTAR DC706

Write EXT EEPROM and INT flash data to a new GPEC2A ECU- OK


Chrysler Continental GPEC2A ECU Read and Write with OBDSTAR DC706

OBDSTAR DC706 ECU Tool read and write Chrysler Continental GPEC2A MPC5674F+25320 ECU in BOOT mode perfectly!

www.obdexpress.co.uk

OBDSTAR DC706 Guide: IMMO Off for VW 7GV ECM on Bench

 This is a tutorial on how to do Volkswagen 7GV ECM IMMO off with OBDSTAR DC706 ECU Tool on Bench. Read this article carefully to learn the procedure step by step.

Required Accessories

OBDSTAR DC706

Main cable

P004 ECU Clone Jumper + Adapter

VW 7GV ECM

12V 5A power supply


OBDSTAR DC706 ECM IMMO Off VW 7GV by Bench

ECU Flasher >> ECM >> Latest version >> VOLKSWAGEN MAGNETI MARELLI IAW 7GV 95320

Click "Guide" & "Pinout" to check connection instruction.

After successful connection, turn P004 ignition on.

Start >> BENCH >> P004 >> OK


OBDSTAR DC706 ECM IMMO Off VW 7GV by Bench

This function is available by connecting the server, please ensure the Internet connection is normal.

No need to connect, directly back up data.

Click "Read EXT eeprom(95320)".

Save data file.

*The save path of the file will be displayed on the left.

The data backup is successful.

Now write the backup data into the module.

Write EXT eeprom(95320) >> Load external data >> OK >> Load file >> OK

Write successfully!

OBDSTAR DC706 can also operate to read IMMO data and IMMO off.

Read IMMO data >> Load external data >> OK >> Load file >> OK

Read successfully!

Here we’ve got the pin code, CS, MAC and VIN.

Click "IMMO OFF".

Switch ignition off.

Switch ignition on.

Switch ignition off.

Switch ignition on.

Operation completed.


OBDSTAR DC706 ECM IMMO Off VW 7GV by Bench

www.obdexpress.co.uk